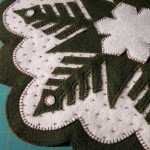
A very belated Happy New Year to all of you! I left 2012 with a nasty cold that left me indisposed for at least a week, but the good news is that I have escaped the flu (so far!). I hope saying that doesn’t jinx me! Certainly the holidays are busy times and rightly so – time spent with family and friends is priceless. This new year has brought me several reminders of just how precious. In the past few weeks, my cousin in Germany lost her husband to cancer, I said a final goodbye to a dear friend of more than 30 years, and another friend is currently recuperating from surgery that confirmed a cancerous brain tumor and an uncertain future. When it rains, it pours. I’m hoping the new year gets better moving forward. It has taken some concentrated energy to focus on stitching projects that I need to get done. I am teaching a workshop/class at Quilter’s Haven in Rosemount in February. Jean carries a wonderful selection of woven wools, so I want to make sure I have some samples of toppers done entirely with the felted woven wool.
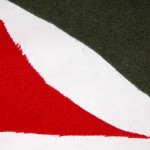
I also am taking this opportunity to experiment and prepare some samples of various options. This is my chance to try to work with materials, supplies and techniques that I might not otherwise try. For the most part I found that good quality wool is nice to work with as it felts nicely, and provides a clean, non-fuzzy edge. It also has a nice ‘hand’ to it – you can feel the ‘substantial weight’ of the fabric. For those of you new to fabric, this doesn’t mean that the fabric is heavy, but that it has a ‘good solid’ feel to it. Less expensive wool can be used, but it tends to be much thinner, can have a different texture surface when felted, and the cut edges tend to fray a bit – unless a fusible is used. Remember that 100% wool is needed in order to felt well.
Speaking of fusibles, I have found that using a fusible is much more ‘usable’ with felted woven wool; in some cases, it is the only way a wool will work for you. While woven felted wool that has had a fusible like HeatNBond applied can feel a bit ‘rubbery,’ I found it to needle better than I thought. However, I have heard from some of my Daystitching friends that stitching with a machine is another matter and that the fusible tends to gum up the needle; since I enjoy the hand work, I have not tried this for myself. Starting this week, I will be posting a series of tutorials following the creation of these samples and some of the many options possible. My wool is washed, dried, pressed and ready to go!
Oh! Did I mention that I can’t believe I recently bought more beads! Given my ‘stash of glass’ I swore that I would not do this. Alas, I realized the beads would be very helpful in teaching classes, if I can offer participants an opportunity to be introduced to the best materials for the job. [NOTE: I have mostly Czech beads which are perfectly fine for me, but Japanese beads have larger holes, so they are much easier for someone new to beading to use.] You can see my purchase in the photos – Japanese size 11 seed beads (unlike Czech beads, Japanese seed beads do not come in a size 10), Silamide thread on the card, John James size 10 long beading needles, and a thread conditioner called Thread Heaven. I will be sharing these items with any class students who would like to try them. Warning: much like fabric, beads can be addictive! I really had to work to keep my purchase reasonable!
For an average table topper, you will likely use no more than about an inch (of beads) from one of those 5″ tubes. And a card of Silamide will be good for many toppers. The thread conditioner is not just for beading, but works well for any sewing thread. If admiring all these beads does not make you crazy about beading, that’s ok. Stay with the tutorial as I made one sample without any background embellishment and another with french knots, sans beads!
Next post will be the first tutorial – I will focus on the folding, tracing, cutting of various templates.


