It’s Friday already (Friday, the 13th, no less!!) and I’m wondering where the week went! It was a very busy week with several appts. (at least I group them together on the calendar so that in the next few weeks I won’t have any – then I can work on projects uninterrupted!) It was wonderful to get back to my Wednesday afternoon quilting ‘Daystitchers’ group; I hadn’t been there since almost mid May and I miss the conversation and creative energy the group provides. Waking up to a warm, overcast, and somewhat muggy day (ughhhhh) was less than inspirational this morning. Usually, before I begin tackling the day’s activities, I enjoy walking each morning, but the extreme heat has made outdoor activities more or less miserable; and there is the matter of mosquitoes – in great abundance this year – so I opted to retreat to my computer and get this post written. I hope where ever you are reading this, the weather is more agreeable. Of course, I also have to acknowledge the upside of lousy weather conditions; we are less tempted to spend time outdoors and can guiltlessly (is that a word?) spend our time working on our creative projects!
STITCHING THE INDIVIDUAL APPLIQUES – MAPLE HALF LEAVES
The last post finished with the topper having both the maple leaf and oak leaf ‘snowflake’ appliques entirely stitched down on the cream colored top background/base. While the sample shows the two appliques ‘woven’ together, it will look equally fine if you chose to simply stitch one on top of the other. Using the half maple leaf appliques – 6 will be red and 6 will be gold/orange – that you had set aside, carefully remove the freezer paper from the back. (These freezer paper patterns can be used again, so save them if you are considering another topper.) Using the Applique Placement Guide in the pattern, place the felt appliques right on top of the ‘snowflake’ appliques. You can play here a bit – maybe choosing to use two red appliques on one leave, then two orange/gold appliques on the next, resulting in 3 alternating red maple leaves with 3 orange/gold maple leaves. If you are using wool felt, one very nice quality is that it is totally reversible – you can flip over the appliques and use either side – thereby giving you even more options: you could still have maple leaves of two colors, but on one leaf the red half might be on the right side, and then on the next adjoining maple leaf, you could place it on the left side. (If you are working with felted wool, you can probably do the same thing, provided you like the reverse side of the wool.)
Once you have decided how to lay out your appliques, center, adjust and ‘tweak’ as necessary, pinning adequately to keep in place while you stitch. Applique each 1/2 leaf, using a contrasting thread for added color. At first, the feeling of having one applique placed entirely on top of another will feel a bit awkward, but here is where the properties of wool felt come in to play. Wool felt will gently ‘move’ into place with so much encouragement as a simple tug on your thread, a push of your thumb, or just working it into place with your fingers. Where synthetic felts will come apart, wool fibers naturally felt together forming a very strong connection that tolerates such ‘blocking.’ It helps to hold the background/base with the fingers of one hand underneath the base layer while you stitch, allowing you to be able to kind of ‘roll’ the felt while you take a stitch, and then tug the stitch (and felt edge) into place. (See the pictures in http://www.designandbemary.com/fall-leaves-part-2/#more-436 for an example of my hand position.) This will help you to achieve a smaller stitch. You also will find that most of your stitches do not go entirely through the base felt, etc. This is OK and will be more than enough to hold the applique in place. Believe me, I have tried to remove an applique and found that the stitches – after I cut and ripped the thread out – actually kind of ‘felted’ the background and applique fibers together and it took some tugging to remove it!! Once done stitching, turn over the piece and steam press. You’ll be amazed at how this ‘flattens’ out the layers!
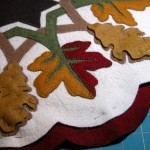
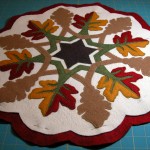
Close up view of the finished maple leaf appliques, with the oak leaf appliques laid out and pinned.
OAK LEAVE APPLIQUES
Remove the freezer paper from the oak leaf appliques – centering, adjusting, and tweaking them so they sit nicely on top of the oak ‘snowflake’ applique. This time there should be a generous 1/8″+ edge of the bottom applique showing around the top oak leaf applique. Even with my best efforts to be accurate when cutting out the appliques, I sometimes find it helpful to use a scissors and ever so slightly trim the top applique so it’s edges match the applique underneath it. Remember, wool ‘moves’ so these minor discrepancies will occasionally occur. I lightly pin all the oak leaf appliques in place; but not for final stitching, as there is some embellished stitching to be done on the oak leave appliques.
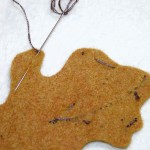
I now un-pin one oak leaf applique at time, and using a non permanent marking tool, I lightly draw out the stitching lines as are indicated on the pattern guide sheet. Personally, I tend to use these marks as a guide so I keep them as minimal as possible, just marking enough to guide me. If my stitching wanders a bit to one side of a marked line or in a slightly different curve, it makes little difference and is sometimes more interesting! After all, isn’t that like nature? Be as exacting as you are comfortable with. Once this is done, I used a stem stitch to embroider the lines, placing any knots on the back at least 1/4″ from any edge (so they don’t interfere with the blanket stitch later on). I also use a technique commonly known by quilters as ‘traveling’ – moving a thread from one stopping point to another starting point by passing it through the center thickness of the wool felt. This is one quality of washed wool felt that I really adore – I hate having any more knots than I have to have! I hope you can see this in the picture. Did you know that Native Americans brain-tanned their elk, moose, and buffalo hides, making them wonderfully light, but thick enough to pass their sinew threads through the center of the thickness as they beaded and quilled?
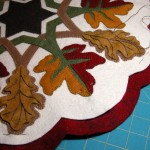
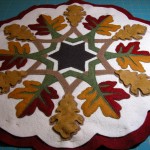
Closer view of the finished maple half leaves, with the embroidered oak leaf appliques, pinned and ready for stitching.
Once you have finished the embellished stitching on the oak leaf applique, replace it on the topper and pin adequately. You can choose to applique it to the background at that point; I usually go on to the next leaf, repeat the embroidery process, re-pin, and finish all six leaves before using the blanket stitch to applique them all to the background. Once more, turn over and steam press when done.
ACORNS/ACORN CAPS
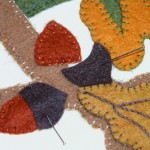
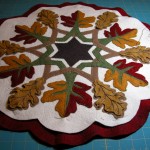
Acorn appliques with the ‘bottoms’ stitched and their caps – ready to be pinned in place and appliqued.
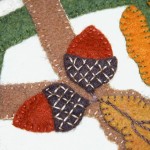
Again, remove the freezer paper backing from the acorn and acorn cap appliques. Following the placement shown on the pattern guide, pin the acorn bottoms in place and applique in place with a blanket stitch. Then, place the acorn caps accordingly and pin in place. I do not use the blanket stitch to applique the caps. I simply use a back stitch (you can also use a modified running stitch back and forth if you want) – and while this results in the decorative textural stitching on top, it appliques the cap to the background at the same time. To be honest, I don’t even draw the lines on the felt as the piece is so small and I rather like the slight variations that occur when stitching without such lines – once more, a bit like the natural world! At the top of the cap, I stitch a small stem to connect it to the oak leaf stem.
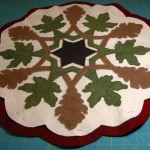
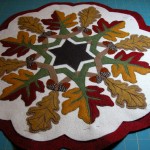
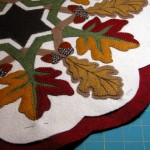
Sit back, take a nice deep breath, and smile! Your topper should be looking quite nice by now – all appliques have been embellished and stitched in place. While I enjoyed the look of my designs at this point, I couldn’t help but envision just what effect a beaded background might provide. I can’t wait to guide you through the beading materials and techniques so you can add a distinctive ‘spark’ to your topper.








HI There, Thanks for tutorial. You do beautiful work. I will continue to peruse your projects as you add them on. I am totally new to this type of stitchery. I find I love it. I am generally a quilter and have six projects going at once and this new one a “Primitive Gathering” one I am learning on.
Keep up your lovely work.
BTW can you share the name of the pattern and how can I get it, for the next few months as it will take my time to finish what I am doing, HAHA
Pat
hi Pat! Glad you enjoyed the tutorial. I always hope that sharing my techniques and materials is helpful. You sound a lot like myself; I am also basically a quilter who somehow ended up getting ‘involved’ with wool felt and felted woven wool! Suddenly, I needed another closet/room to store all the wool and wool felt!! Yikes! Guess we quilters and stitchers all have some common traits! Right now I am finishing a most unusual quilt for my grand niece (for her wedding which was in May, but since I fractured my shoulder things didn’t work out to hit THAT deadline!! 🙂 I will post a picture when I finish it, but I want to give it to her and her husband before posting it, as she is a ‘friend’ and would likely see it. She used to do geometric ‘doodles’ so I reproduced one of them – needless to say I will NOT be doing that again! The ‘math’ and geometry was deceptive; there’s a reason I went into art! (NO math!! he! he!) I have several other quilts to ‘quilt’ but since I am a hand quilter, this could be a slow process. Would love to be able to afford to have some of them machine quilted. Guess I have to admit to enjoying the hand sewing and stitching.
The pattern in the tutorial is called Fall Leaves. Here is a link to the page where you can find it: http://www.designandbemary.com/products/fall-leaves-applique-pattern-wool/ Hopefully this will work for you – if not, drop me a line! Meanwhile stitch away! Enjoy your project!