It is a beautifully sunny Monday morning – at least through the windows! Unfortunately, the view through the windows belies that fact that temps are predicted to hit 100˙ with an ever increasing amount of humidity, making for yet another very uncomfortable day outside. While I will take in a quick walk through the garden, it is likely my day will be spent inside…again! Yes, I have plenty of projects waiting for my attention, but I’m beginning to be a bit frustrated with the continued high temps/humidity this summer. Watching the weather news across the nation, I realize I am likely not alone in my feelings!! I hope those of you who are in areas of similar hot weather are finding ways to get those special projects/UFO’s done while waiting for more reasonable, cooler temps. If one of those projects happens to be a wool felt topper or table runner or if you have been following along with this series of posts – it’s time to add a distinctive ‘spark’ to your piece. The visual effect of tiny glass beads on wool felt adds a whole new dimension to any piece. Time to get beading!!
BEADING SUPPLIES
Before I go any further, I do have to share my rather humorous beginnings regarding the beading done on my toppers. Years ago I took a class from a master native beadworker and learned to do beaded applique. I also worked for 12 years (part time) in a bead store. Those of you who have fabric stashes (and you know who you are!!) will understand how I might have amassed quite a collection of beads! (Non-beaders have NO idea just how many tantalizing kinds, colors, sizes, and shapes of beads are out there!!) Within the last few years, the ‘fairy of fun facts’ sat on my shoulder and discreetly reminded me that I have only half a life time left; since my collection is ‘enough for a lifetime’ this creates an obvious discrepancy!! Mmmmm…time to think of more ways to use those beads!! The wheels started turning…. That first wool felt topper was crying out to be a bit more distinctive and it needed a ‘spark.’ After beading the background, I was hooked. More or less unfortunately, I have come to the realization that at a mere 300 – 600 seed beads per topper, I have barely made a dent in my bead collection!! Guess my search for ‘bead usage’ will continue…
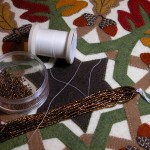
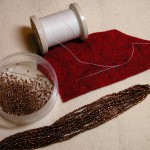
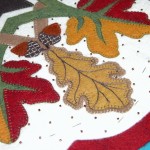
Beading supplies laid out against the appliqued top – a ‘first’ check for how the bead color might work.
Once all the appliques on your topper have been stitched down to the top front background/base, you can now choose to bead the background (other options might be french knots or perhaps no embellishment!). For best results, you will need a long beading needle(they make them short as well, but long works best for this application) – usually a size 10 – and this is often included in those assorted sewing needle assortments. I use Silamide thread – I was once told that it is an old Japanese sewing thread – needless to say it is a veryyyyy strong thread, much more so than the common Nymo thread. It used to come on a big spool, but is now also available on a 40 yd. card. It comes in a small range of colors – choose a color that matches and blends in with the background, but also keeps the color of your bead true. Believe it or not, a bead color can be affected by the color of thread that runs through it! In this topper, I am using an off white thread since the background is cream, and the thread will also keep the ‘smoke topaz silver lined’ beads true to color. (For dark backgrounds, I resort to using a ‘neutral’ thread – like a gray or taupe, something that matches the hue/intensity of the wool felt – but will not distort the color of the beads.) If you can’t find Silamide, use a fine, strong nylon/polyester sewing thread (try to break it with your hands – it shouldn’t break easily.)
The choice of beads available is amazing. I recommend using a size 10 or 11 glass seed bead. Size 10 is slightly bigger (smaller number = bigger bead). Most seed beads today are produced in Czechoslavakia and Japan and come with a vast range of colors and finishes. Czech seed beads are shaped more like a donut, are a bit more irregular, and usually come on a hank – 12 strands of beads, doubled over and tied at the top. (Occasionally, a shop will buy ‘mixes’ from a supplier and then sell these in tubes). One or two of these strands will be more than enough for the background beading. Because of the irregularity of the beads, don’t be surprised to discard a few beads. Czech beads come in different styles: regular, 3-cut, 1 cut, etc. Japanese seed beads are always in a tube; and they too come in a dazzling array of colors, etc. Like Czech beads, they come in different styles: regular, cylinder, ‘delica,’ and you might find them with names like Toho and Miyuki. They are shaped more like a cylinder and are much more consistent in shape and size than Czech beads; they also have larger holes and many people find it easier to work with them. I will also suggest that you might want to finish the top appliques first – then take it along to pick out a bead color. It’s amazing to see the effects of different bead colors. If possible, I even lay out a few individual beads on the surface of the felt to see how the color works!
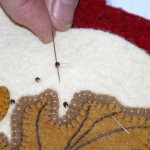
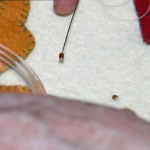
‘Holding’ the bead on your needle – while you tighten the sewing thread. This will help the bead lie nicely on the felt.
BEADING
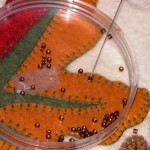
To begin beading, place some beads in a shallow lid cover. Remove the pins – holding the top background (cream) to the ‘outermost’ background (red) – from about 1/4 of the topper. Thread your beading needle, knot, and with your hand between the two backgrounds, bring the needle up through the top background, where you want to place your first bead. I generally place my beads about 1/2 – 5/8″ apart. At this point, using the tip of your needle, pick up a bead and slide it down the thread so that it will lie next to the felt.
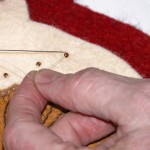
Now take your needle and thread back down through the felt to secure the bead. Notice in the picture that I go back down about a width of the bead away from where I came up. This will help the beads to lie flat against the felt. Also, once you have gone back through the felt (but before you pull the bead all the way to the felt), a little trick is to take the beading needle and (holding the thread on the top out of the way – see picture) place the tip through the bead, then slowly pull the thread tight as you hold the bead and it slides down into place, laying exactly the way you want! This is a bit difficult to describe, so I hope the pictures give you the idea. After securing a bead, simply move over a half inch or so and repeat the process. pinning and un-pinning areas as needed. For extra security, after every 6-12 applied beads, you can periodically knot the thread from the back (no need to cut the thread); that way, should the thread/beads ever be accidentally broken, you will only lose a few beads. Sew each bead securely and snug against the felt, but be aware of puckering the felt with stitches that are too tight! This is an advantage of my pinning and unpinning areas as I work – it tends to help me keep the topper mostly flat as I work, making it easy to see potential puckering!
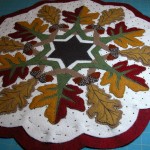
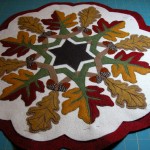
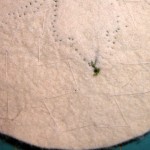
Fully beaded and appliqued top background – pinned and ready to to be appliqued to the outermost (red) background.
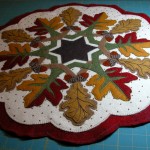
Completely appliqued and beaded top background, now stitched to the outermost (red) background with blanket stitch
When done beading the background, turn over and steam press. This is important as it seems to ‘set’ the beads into the felt. I avoid pin marks by removing and replacing the pins as I press each area. You should now have a completely appliqued, beaded top that is pinned to the outermost (red) background. Using a blanket stitch, you can applique the two together and once more steam press from the back. You are so close to being done….you can taste the sense of accomplishment and success! The next and final part of this series will reward you with the finished product!

Thank you for mentioning all the beading supplies needed for this. I want to start a new hobby this month. I will find a great tube beading shop nearby for this.
Thank you Tiff! Glad you found it helpful. Warning! Beads are addictive! LOL! If you look under the Menu Header “Reources/Errata” you’ll find a few suggestions for places to purchase beads. I can also add to that the website for the store that I purchase most of my beads from: StormCloud Trading/Beadstorm, in St. Paul, Minn. PH: 651-645-0343 They have an incredible selection, of both size 8 and size 11 Japanese glass seed beads, all sold in 6″ tubes. They also carry beading needles (if you want to use actual beading needles instead of the sz. 9 Jeana Kimball Embroidery needles) and they carry Silamide thread which is an extremely strong beading thread. Hope this is helpful and that you will enjoy your new found hobby!