It’s been a busy 2 weeks since I finished the Fall Leaves ‘tutorial’ series. I needed to take a break from ‘talking about felt’ on the computer and wanted to actually play with some ideas that have been rolling around in my head! We also managed to take a few days and headed north to Duluth to visit my daughter, son in law, and our two little ‘grandgirls.’ We had a great time, even though the normally cool breezes off of Lake Superior really did not provide any respite from the hot weather. Braving the hot temps, we took the girls to the zoo: observing their enthusiasm (while I was trying my best not to wilt!) reminded me that children seldom let excessive heat interfere with plans for the day! We grown ups should be so enthusiastic!! Duluth also has great little bead store – Superior Beads – and (despite my previous vow not to buy any more beads!) I did shop for a some new Japanese seed beads in colors to use with wool felt. I intend to write a post in the near future with more about seed beads, etc. (You will be amazed at how much there is to learn about beads!) On the drive home, we stopped to visit the historical Northwest Fur Trading Post in Pine City. What a surprise to find a very informative display on the felting process used to make beaver felt hats! Felting is certainly not new!!
HISTORICAL FELT
Since I enjoy history, I was certainly aware of the near extinction of the beaver in an attempt to satisfy the popular desire for a fashionable beaver fur hat. It certainly is a luxuriously soft fur. I guess I had assumed that hat construction involved the use of a beaver hide – sewn fur side out, shaped, cut and steamed while being blocked over a hat mold. Not so!! This very informative exhibit demonstrated that the beaver fur -sans guard hairs – was processed and made into a felt batt material that was then used to create the much desired hats – as well as a few other items. They had actual samples of the fur as it was processed into felt, including the batting, the first ‘cone’ hat form, as well as the final, more heavily felted hat form. It became incredibly soft and thick – I thought it seemed at least as soft – if not softer – than cashmere! Needless to say, it all reminded me of the phrase ‘everything new is old.’ I think many people are only familiar with acrylic felt as an inexpensive craft material, rarely realizing that wool felt has existed throughout history as a useful fabric – durable, warm, insulating, and versatile.
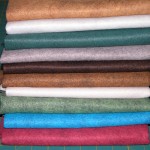
Look what arrived on my door step! More wool…new colors…just begging to be included in my next project!
Upon arriving home, I was excited to find a box waiting on the doorstep – a box of new felt! Only other ‘fabri-holics’ can truly understand the excitement of new ‘material’ to work with! This box included some of the new colors released by National Non Wovens.I love the heathered felts – the bottom five colors (in the stack) – are wonderful. Check out their new colors. I already have used the ‘Tropical Wave’ blue (second piece of felt from the bottom of the stack) and ‘Kiss Me Darling’ red (not pictured in the stack) for a couple of the pins I created while playing around. New colors seem to generate new ideas!
PLAYING AROUND AND OTHER IDEAS
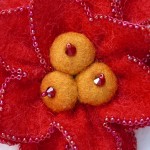
Close up view of petaled and beaded flower pin (‘Kiss Me Darling’ colored felt and Swarovski crystals)
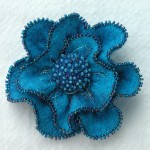
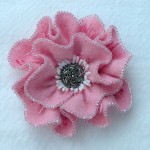
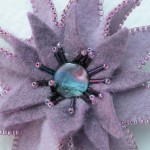
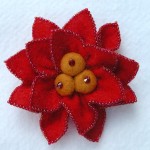
I have been thinking about the possibilities of creating sculptural pins using wool felt, beads, various embellishments, etc. I have seen a few around, but to be honest, have been less than impressed with the quality as they appear to be rather flimsy and I suspect would not end up wearing very well. And when I make my larger table toppers, it seems that I am continually generating a lot of smaller felt pieces – all begging to be put to good use! So I dived in…and had a ball!! Yup, just took scissors, some felt, and started cutting and stitching! It is so freeing to create without the expectation of a certain outcome – just letting the piece become itself! It appears that I enjoyed making flowers, but I can see potential for some abstract, free form ‘collage’ type designs…perhaps some insects?…no limits here! Most of the ‘playing’ simply involves manipulating the felt and getting a feel for what it will do. I spent considerable time creating techniques that would result in a more durable, long lasting pin. All the backs are completely finished and all knots/threads hidden. In many cases, there is a stiffener and/or plastic insert that serves to provide long lasting support to the wool felt structure. Several years ago, I took a workshop from a Native American master beadworker and learned several of these ‘little’ secrets long used in creating their beaded and decorative pieces: after all, they needed their items to be very durable and to withstand the demands of their lifestyle. I have used those same techniques when appliqueing stones/beads to leather, and find that they can easily be applied to wool felt with great results.
These pins are all just a result of experimenting – I am not sure if any of them will someday be a pattern. I am continuing to play and will most likely have some more in the coming weeks. I hope they will generate comments as well your own creativity. It is equally fun to create a realistically inspired design as it is to design a funky, non objective piece! They do make nice ‘short’ projects as most of them could easily be finished within 1-2 days and they are great accessories: on your hats, coats or sweaters, purses, etc.

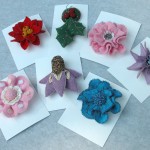
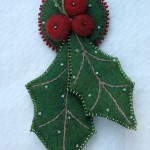
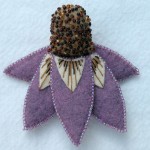
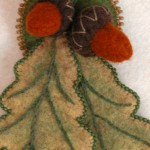
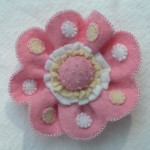
Hi! Wondering if you sell directions for what you make? These are so pretty. Especially like the Holly and Berries and the Beaded oak leaves.
How and what stitch used to adhere the red beads around the green circle on the Holly and Berries and the stitch used for the green beads on the leaves?
Thanks so much!
Cindy
Hello Cindy – so sorry for the late reply but with the holiday season I have been busy with projects and preparations! I need some elves!!! All my patterns – including some of the pins you see here – are for sale on the DesignAndBeMary.com website under the ‘SHOP’ menu banner. The edge of beading really doesn’t have a specific name – I’ve seen it called many names -just plain edge beading, but also picot edge beading. Basically this edge has one bead that lays down sideways against the fabric and another that ‘stands’ up between two of the beads that are against the fabric. I learned it from native american beading styles. The beaded edge also holds the front and back layers together. I have a tutorial that shows the basic pin construction – you and find that here http://www.designandbemary.com/its-been-awhile/. I also have a few videos on DesignAndBeMary YouTube. While this is not the exact beaded edge you are asking about, this video shows the basic process. https://www.youtube.com/watch?v=x354wUVOtkA. Please note that these videos are created with the wool/fabric worker in mind. (For the pins, I use beading needles and beading thread.) The single beads that are sewn on the leaves are simply sewn on individually in a technique I call ‘scatter beading’. I’m hoping to get a video out (soon!) showing that technique which I use frequently on my wool designs. Feel free to subscribe/follow my You Tube site and then you will be notified when I do new videos.