
Turning those sharp outside points!
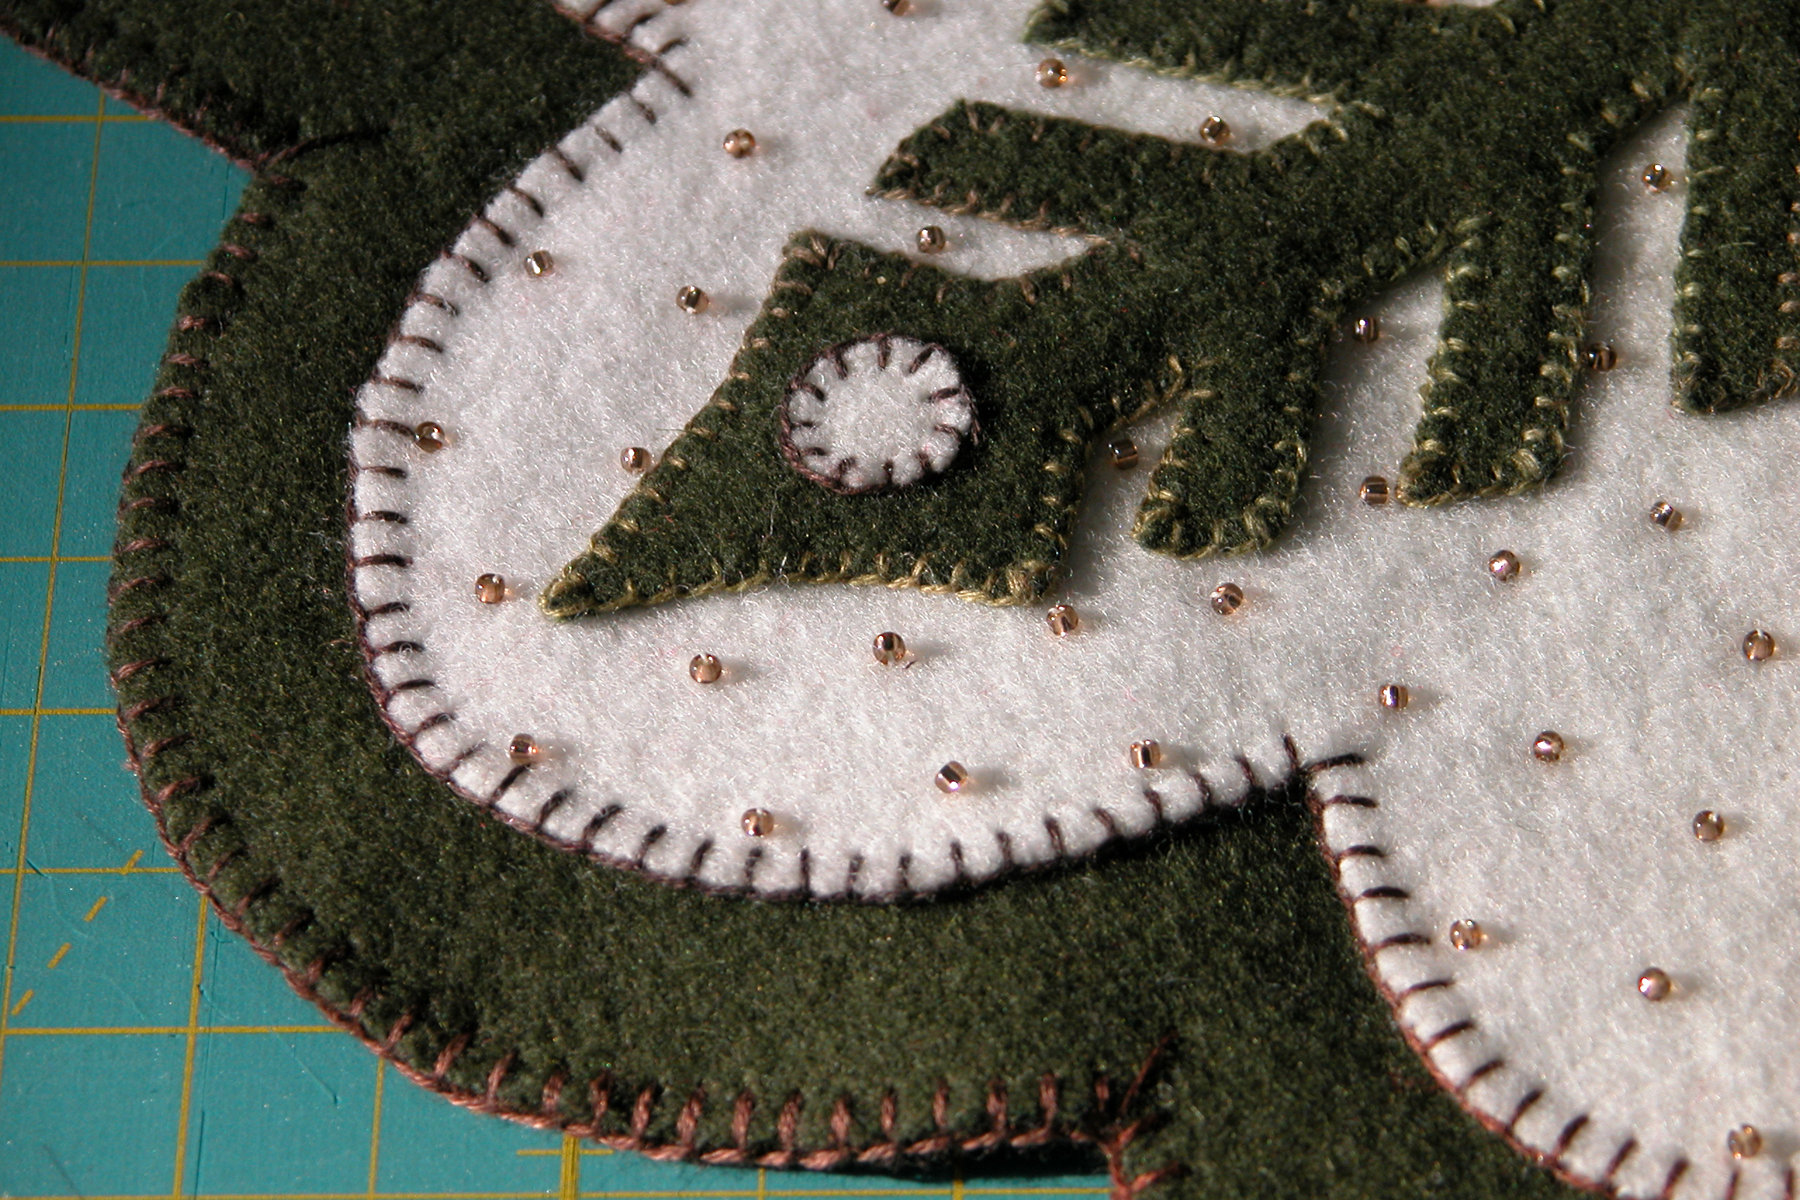
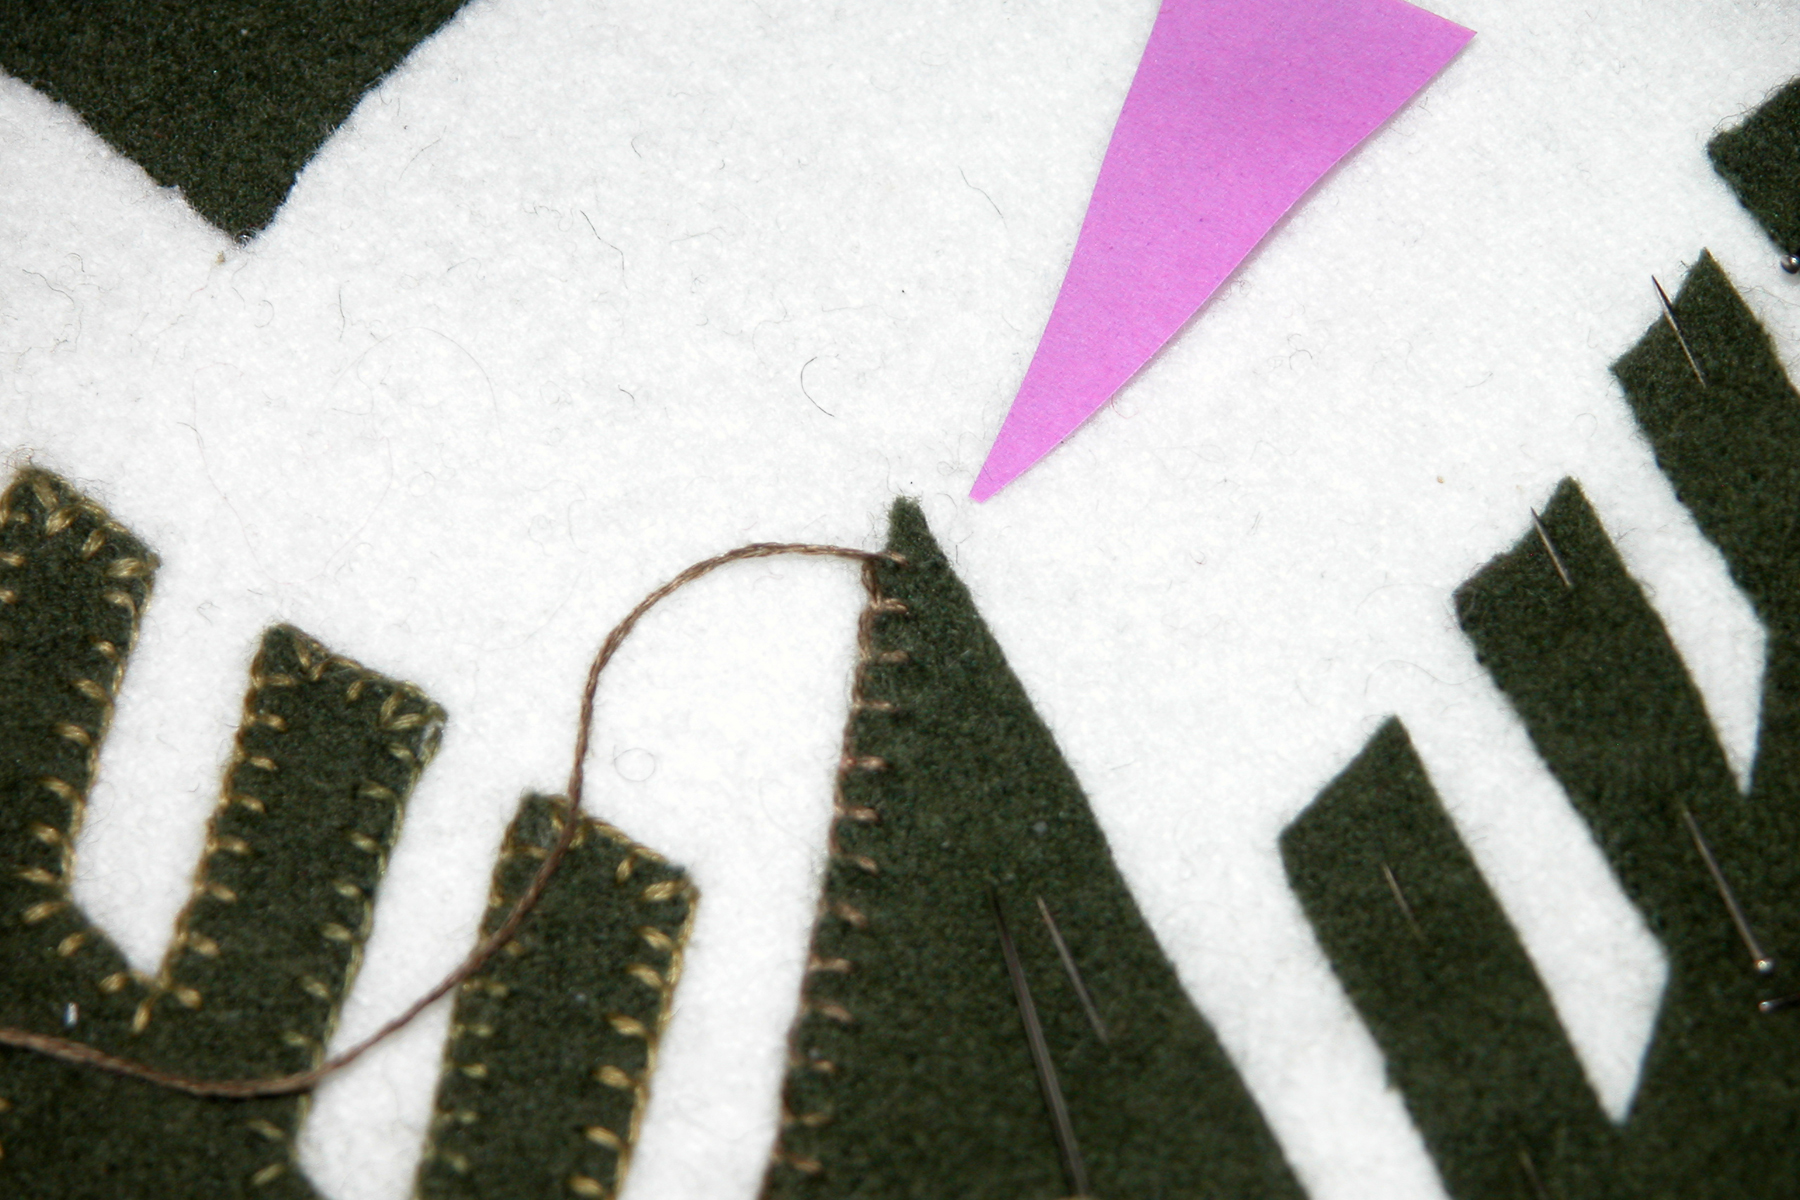
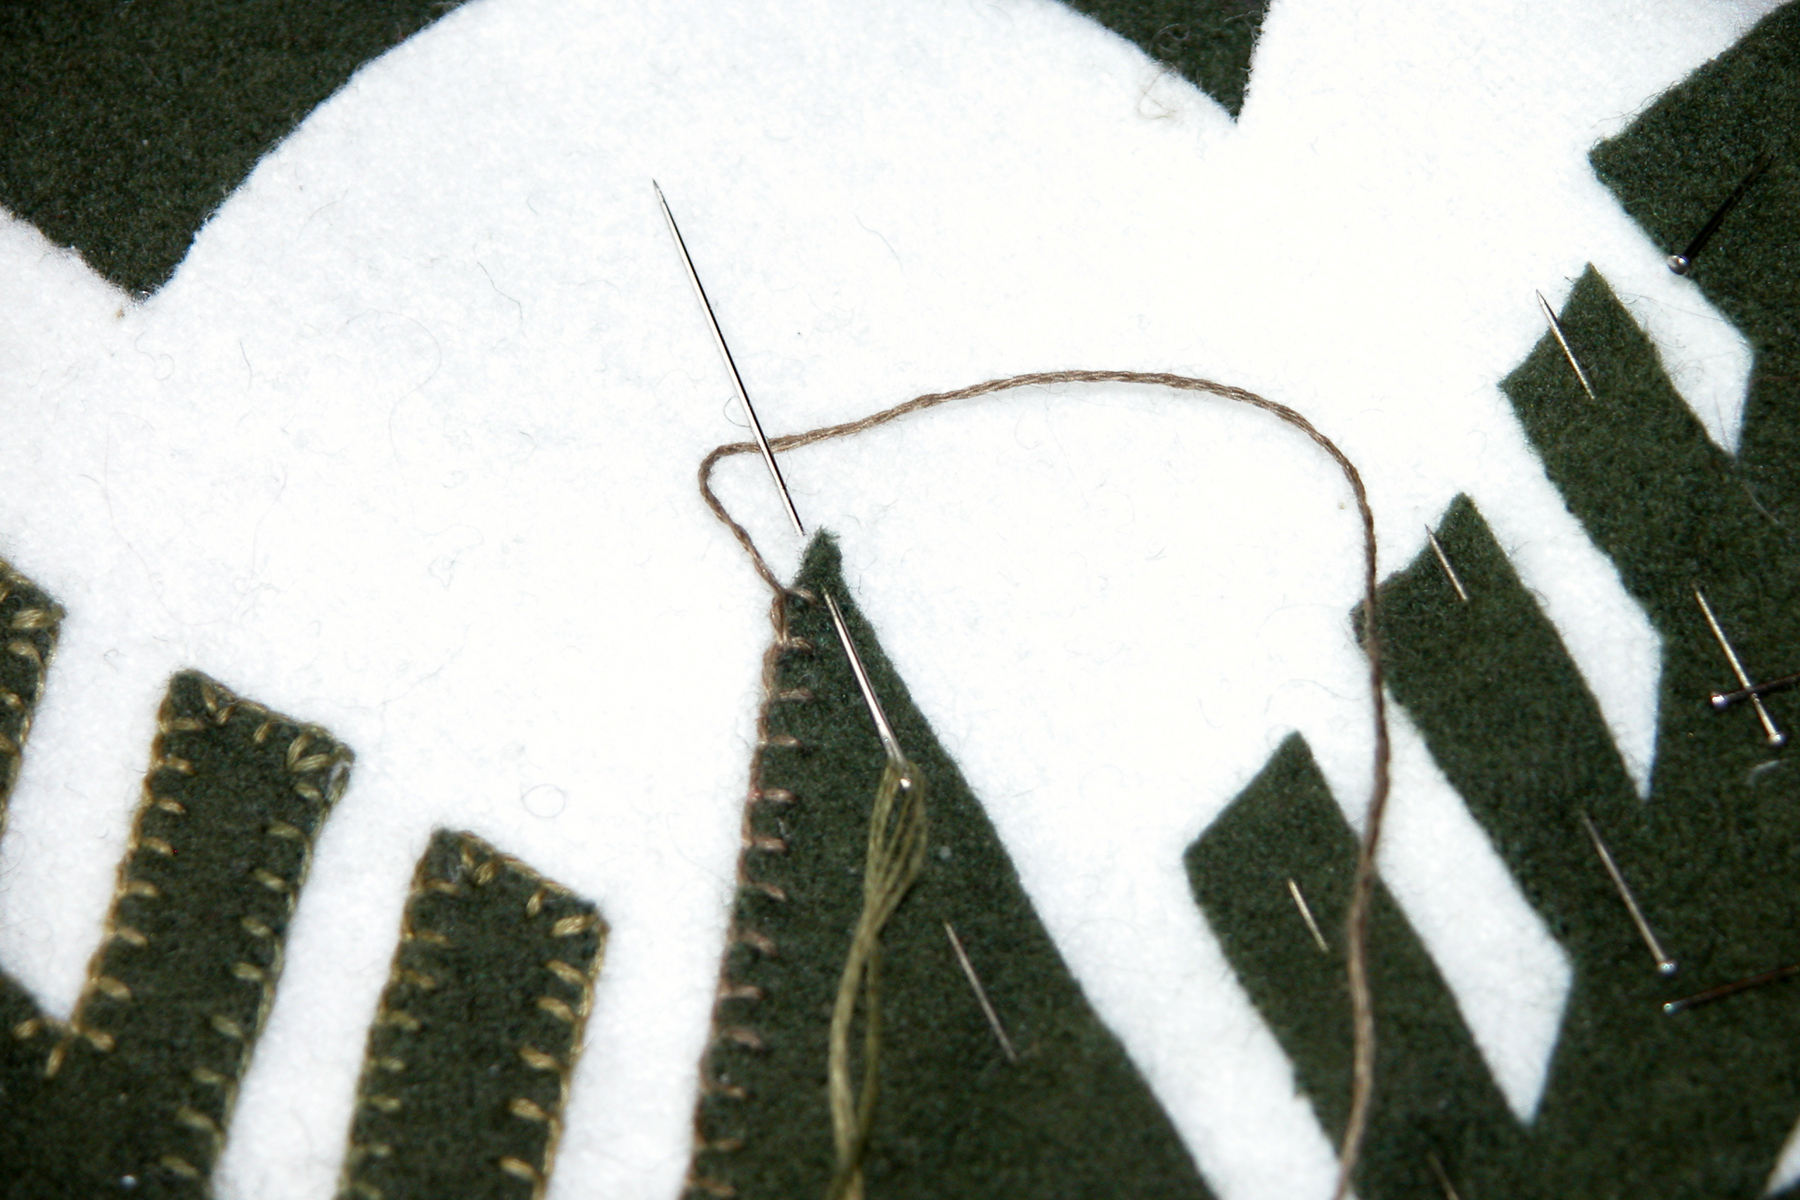
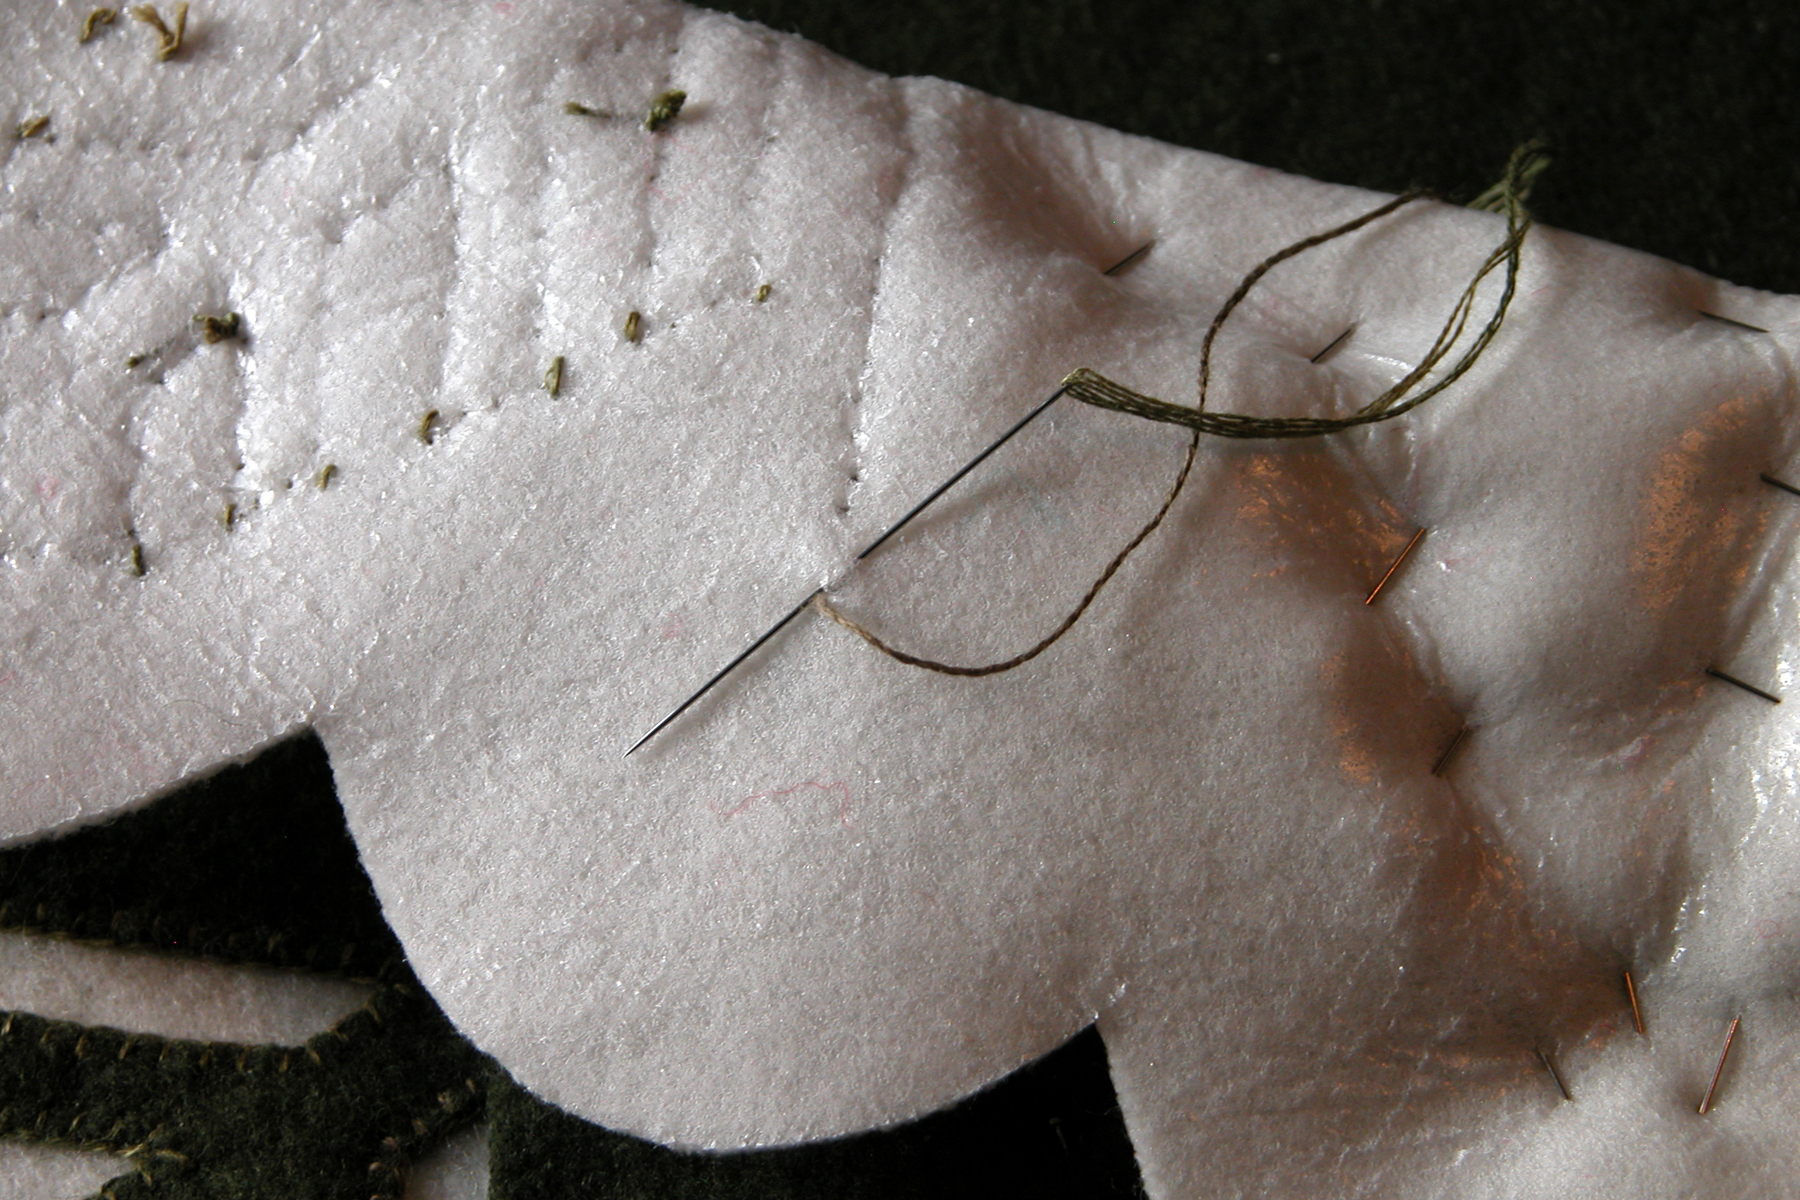
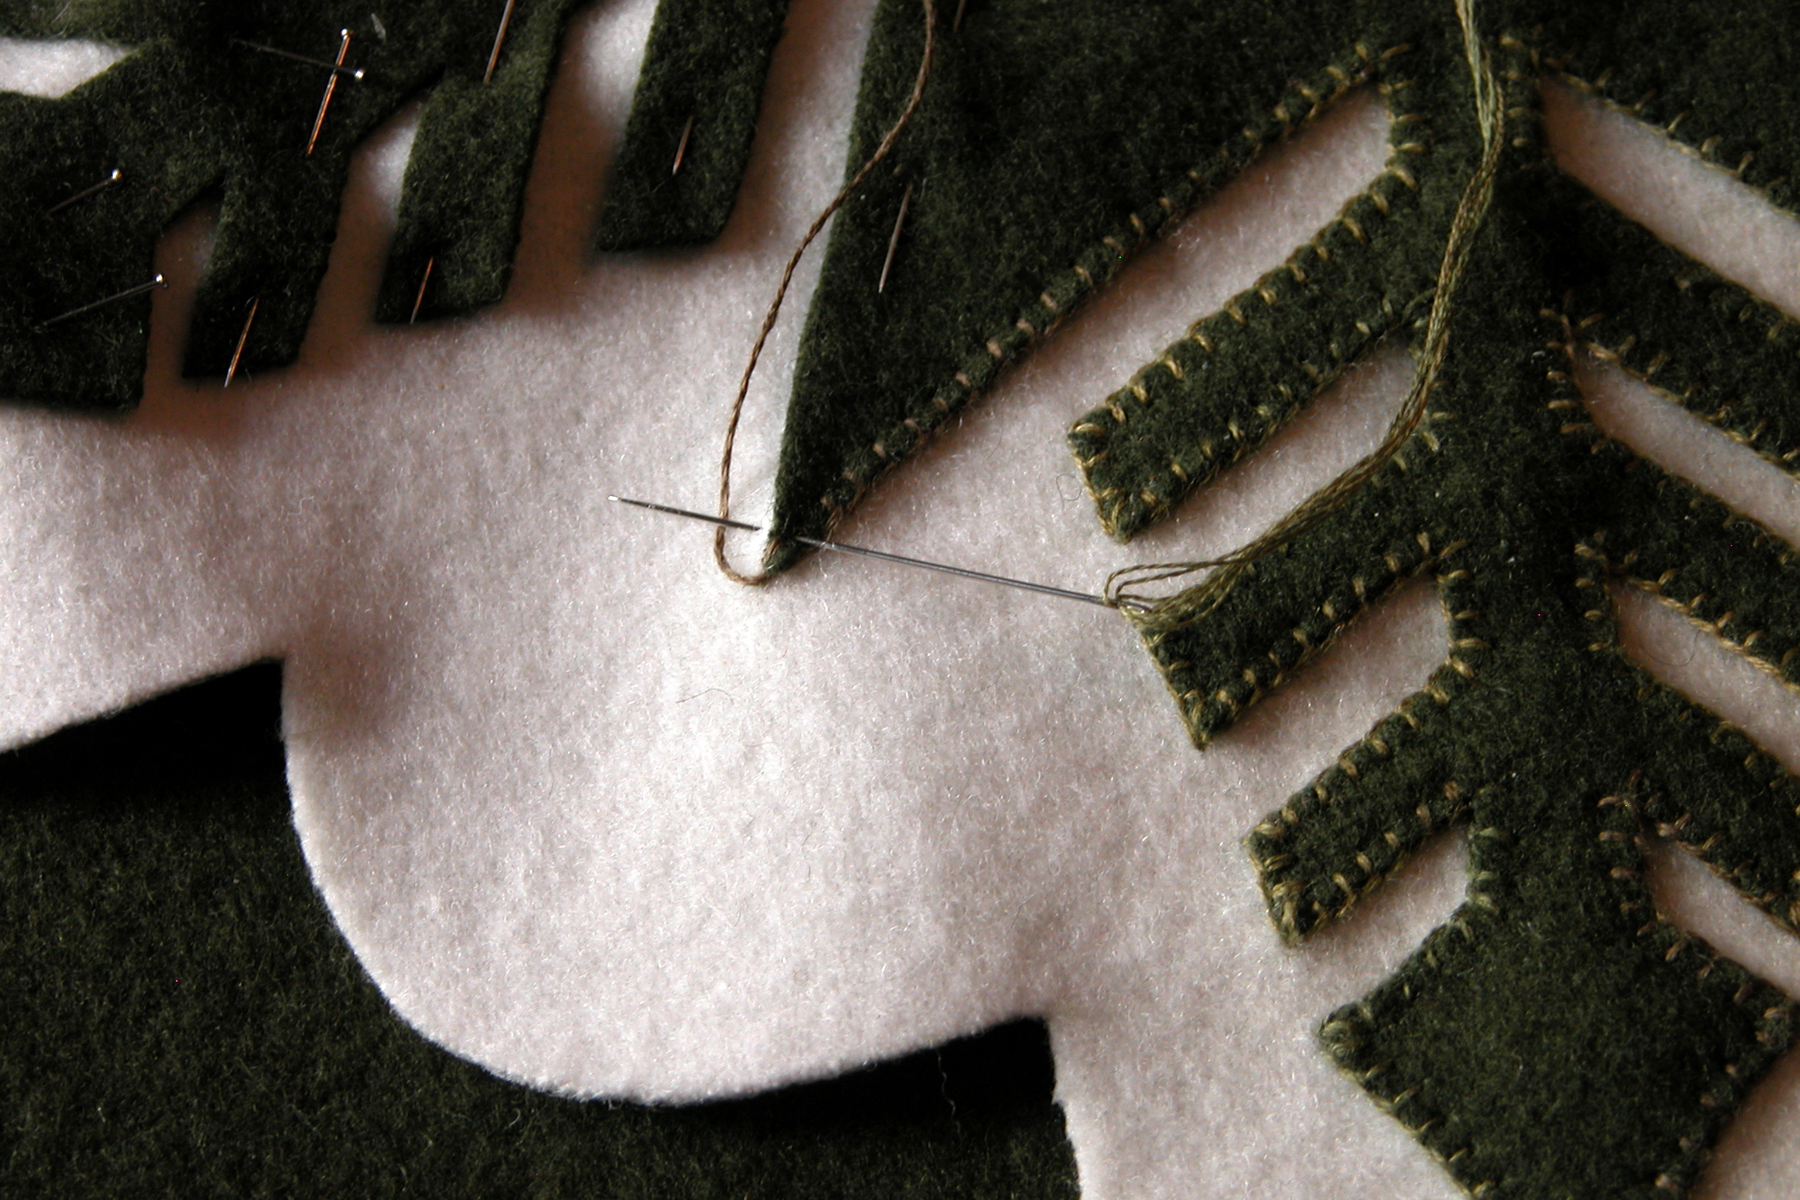
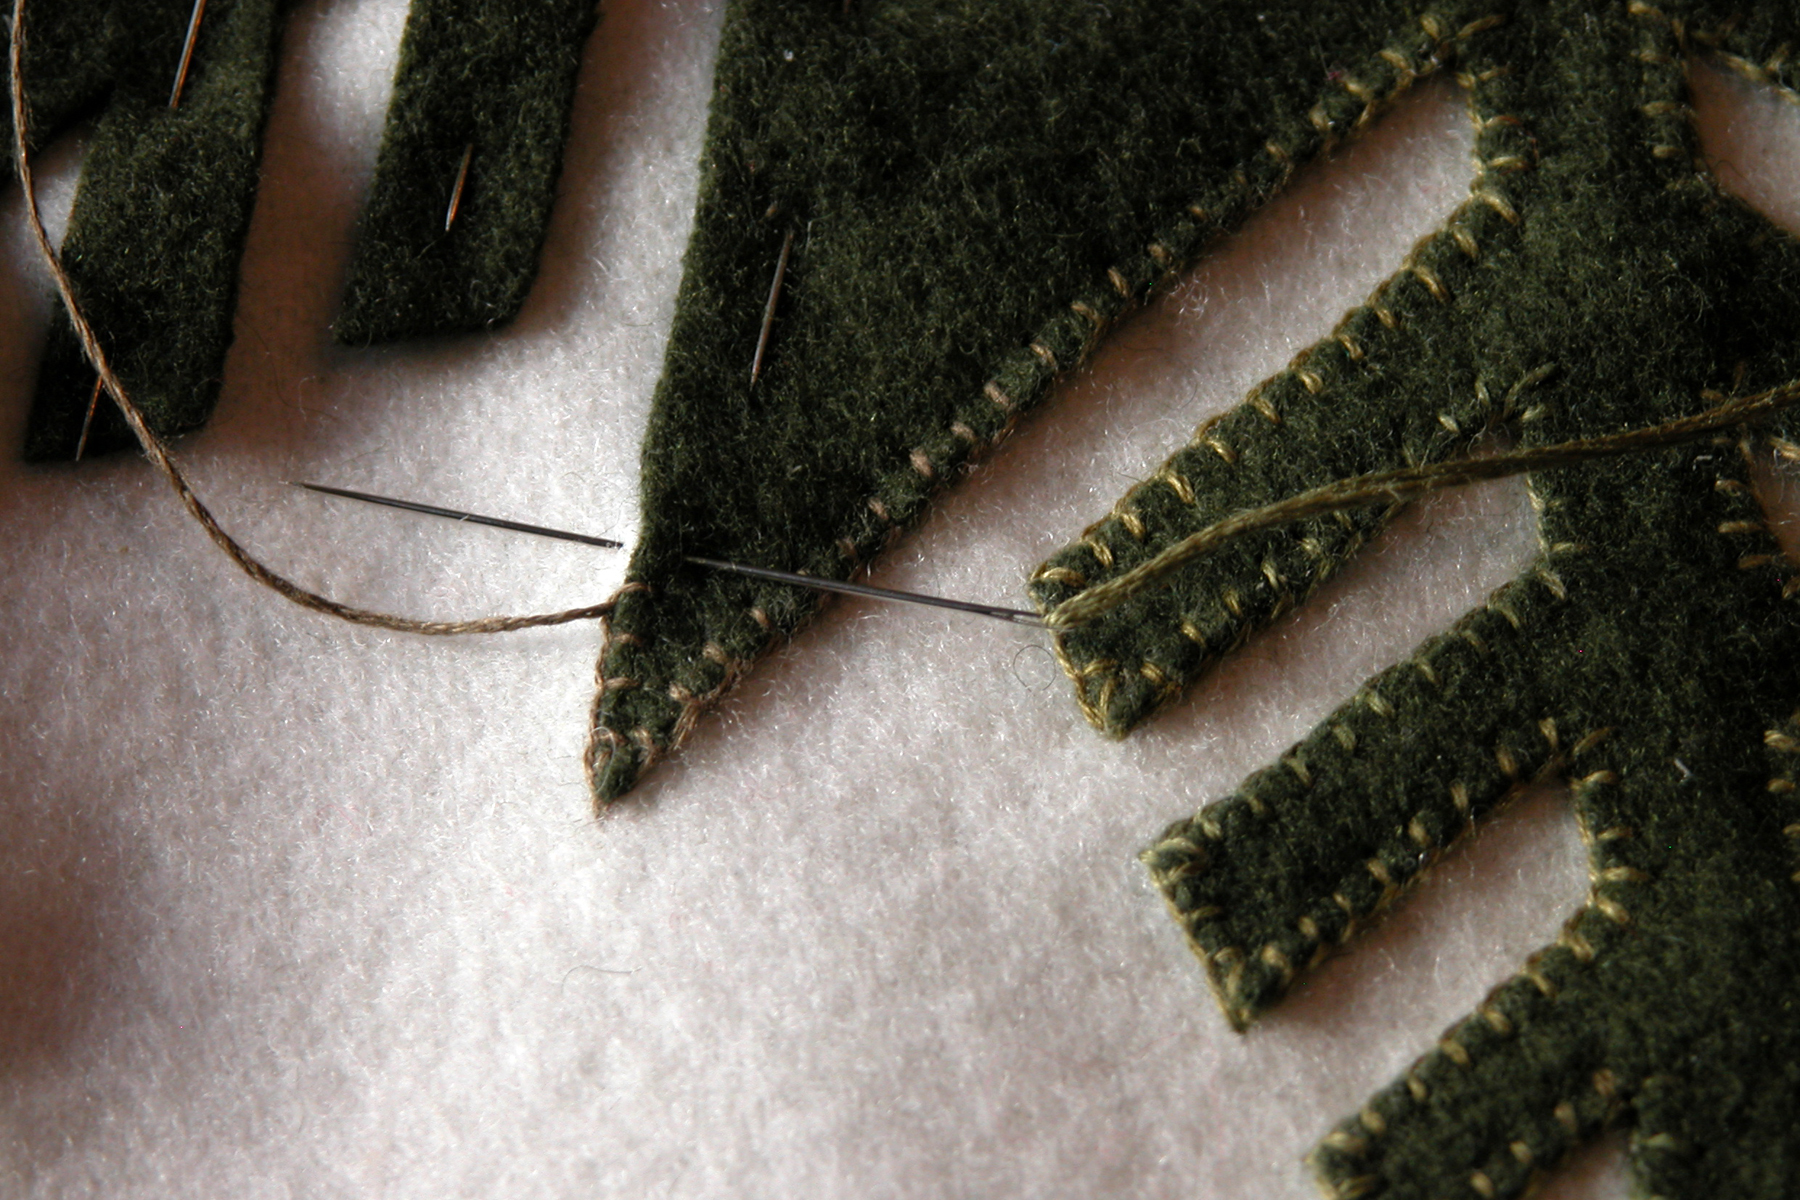
While I will explain the techniques that I have used to get a nicely turned outside point, I am hoping the photos will be somewhat self explanatory. In the first photo, you can see that I have worked my blanket stitch almost to the ‘tip’ of the corner. In the last 1/2″ to 1″ as I work up the side to the tip, I usually try to estimate and space the blanket stitches so that the ‘length’ of the stitch that is taken right at the tip, will be similar to the length of the other stitches along the side. You may also find that in order to do this the last stitch you make – before the stitch at the tip – is not quite as deep as the others. This is really ok – I usually find I kind of aim for the center of the tip. In the next photo (center) you will see the actual ‘tip’ stitch. Start this stitch by bringing your thread around – like you are drawing the letter ‘D’. Insert your needle right in the center of the wool tip – this can be a ‘shared’ hole with the last stitch you took or just slightly above it. Then bring it up right at the very edge of the tip (where the apex is) being sure to catch the base wool. Also note that the needle and thread passes above the thread that was laid out like the letter D. It is my experience that if you come up slightly underestimating the tip, you will get a ‘softer’ tip, while coming up just slightly further out from the tip will ‘sharpen’ the shape of the tip: this can be useful to get the effect you like. However, going TOO far out or falling TOO short results in rather unattractive corners – either scrunching the wool tip or making the stitch look like it doesn’t fit the applique. Bring the needle up slowly. The next step is a technique that helps to prevent this tip stitch from becoming too tight and helps to create a nice, crisp tip. Before I tighten up the tip stitch, I place the tip of my needle in the ‘loop’ (that is formed by the stitch) – laying the needle right at the tip of the wool applique, exactly where I want the top tip of the stitch to be. See the photo on the right. Keeping my needle there, I then gently snug up my stitch to where the needle is placed. You will find that this is also helpful to keep the stitch showing on top of the wool – without this technique I found that the part of the stitching thread often kind of slipped behind the wool, creating a less than appealing stitch, as well as sometimes allowing the wool tip to kind of bunch up to the top and look like it wasn’t being held in place with a stitch.
Stitching up to the tip – ready for the ‘tip’ stitch
The ‘tip’ stitch – note the needle is OVER the thread

Using the needle to help tighten the stitch to a pt.
Once you have carefully snugged the stitch to a nice point, carefully withdraw the needle. Holding the stitch in place with your thumb, insert the needle tip – almost exactly where it came up – and draw the needle and thread to the back of the piece. Photo below left. Be sure you have ‘captured’ the loop part of the stitch. Tighten the thread gently as you set the stitch in place. Place your work so you the back side of the stitching is facing you. You now need to take a small ‘security’ stitch that will keep the thread anchored when you bring it back through to the front to resume your blanket stitch. As in the center photo, simply take a small stitch catching a few threads, but not going through to the front side. This is usually not a problem. Remember that no one will see these back side stitches. Once you have taken this stitch, you can then bring your needle and thread back up to the right(front) side through the same hole that you had made when you went from front to back. The anchor stitch taken in the back should keep your tip stitch from ‘undoing’ and you will have created a very nice point from which you can now start stitching back down the other side of the outside point. See the photo on the right.
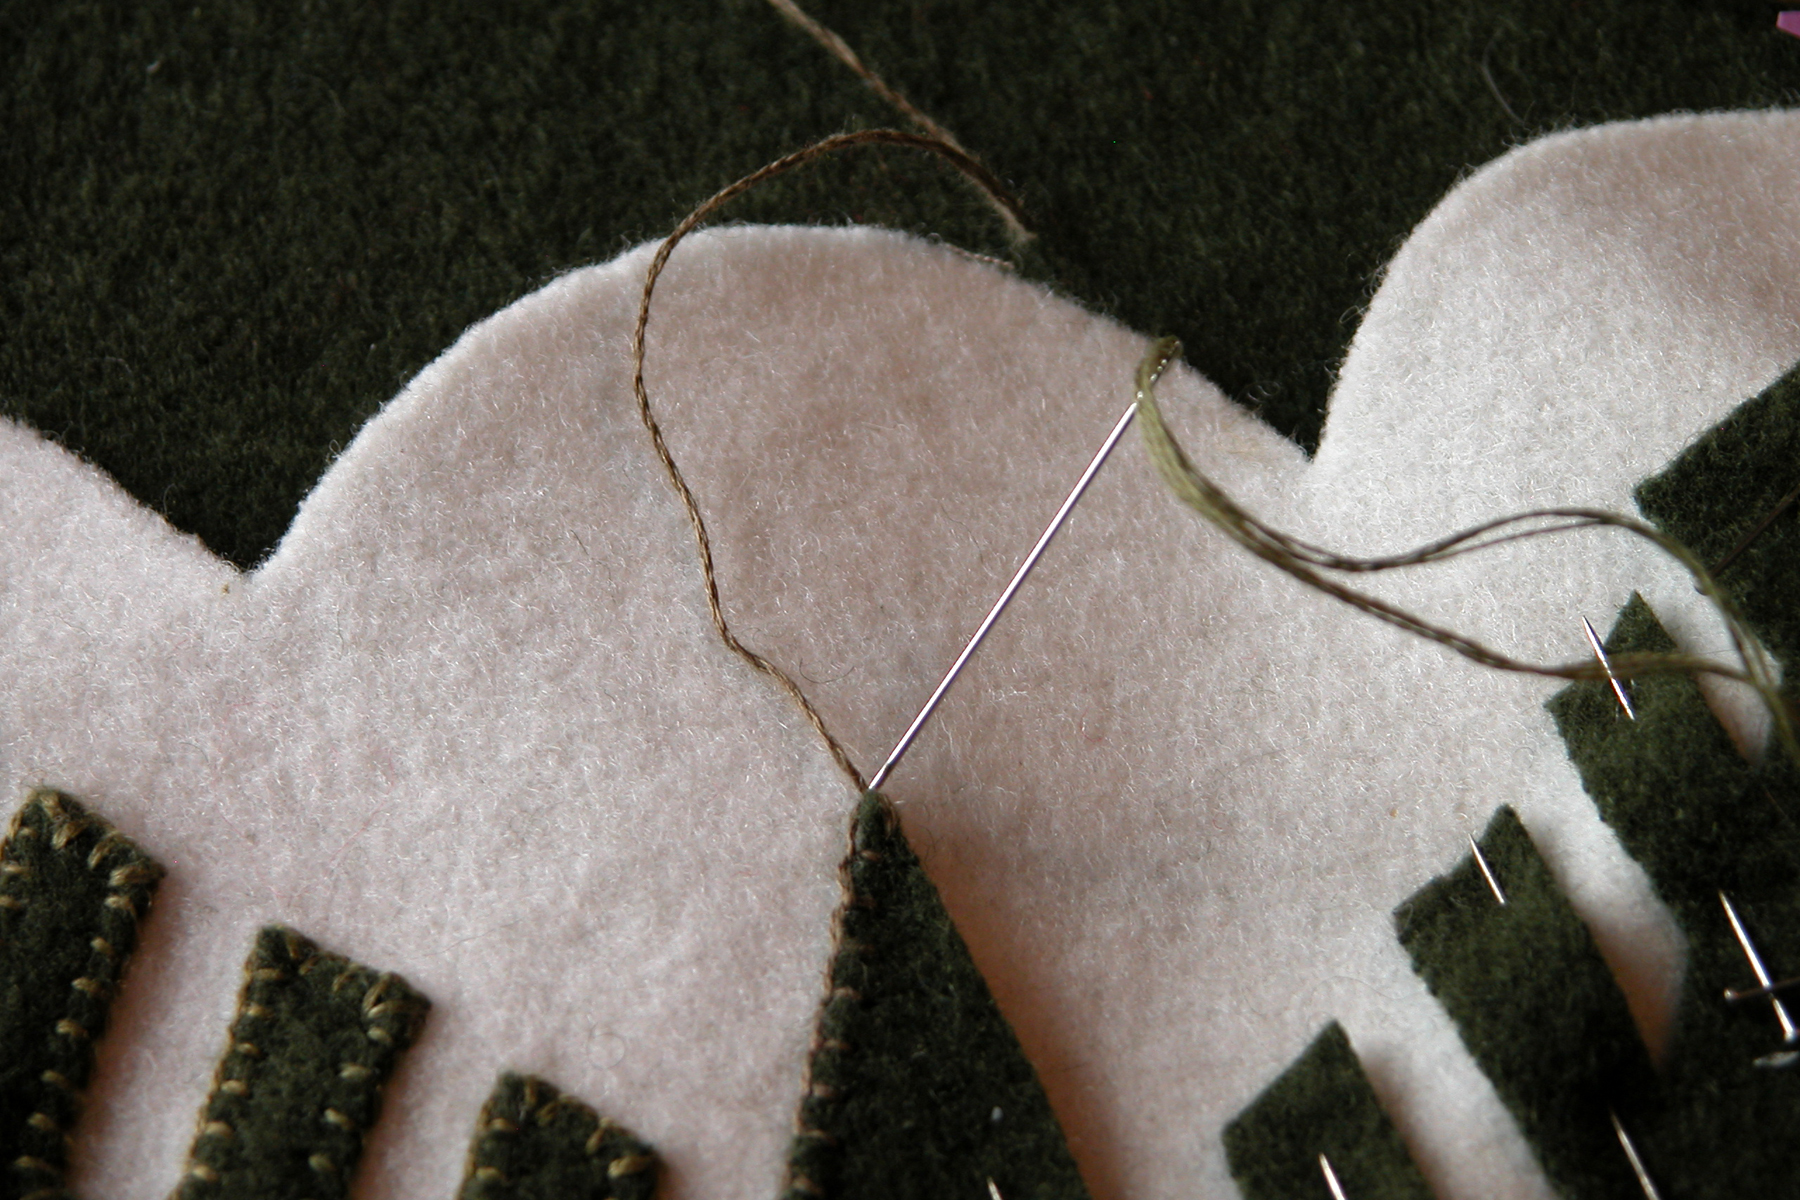
Taking the tip stitch, going through to the back
Taking a ‘security’ stitch on the backside!
Taking the first stitch after the ‘tip’ stitch.
Continued stitching after completing an outside pt.
The first stitch that you take after the ‘tip’ stitch can often use the same ‘hole’ as the last stitch that was taken before the tip stitch. Sometimes the outside apex is quite sharp and there is no other place to go. If the outside apex is wider, then you can choose to place your stitch directly across from the stitch on the other side – making it match in length and depth. If you have the room you do not have to use the same hole for depth. Once the first stitch is done, then it is a matter of ‘business as usual’ – continuing stitching your way around the applique. It may take some time to feel comfortable with getting nicely stitched applique points with this method, so be sure to give yourself time to practice.
After stitching many applique outside points, I tried a number of different solutions and this method has been the most accurate and has given me the most satisfaction. Some stitchers also use a technique where a second tip stitch is taken in the same holes as the first one. I find that the double stitch can be obvious depending on the type of thread used, and I also feel that it results in a somewhat ‘softer’ corner. It never hurts to try both ways, add them to your stitch ‘arsenal’ and use them to achieve the effects you want!
While this is the last part of this tutorial, I’m open to suggestions for any future tutorials. I do have plans for posts about beads/materials/techniques, as well as some talk about threads. Send a comment with any ideas you might have! Happy stitching