
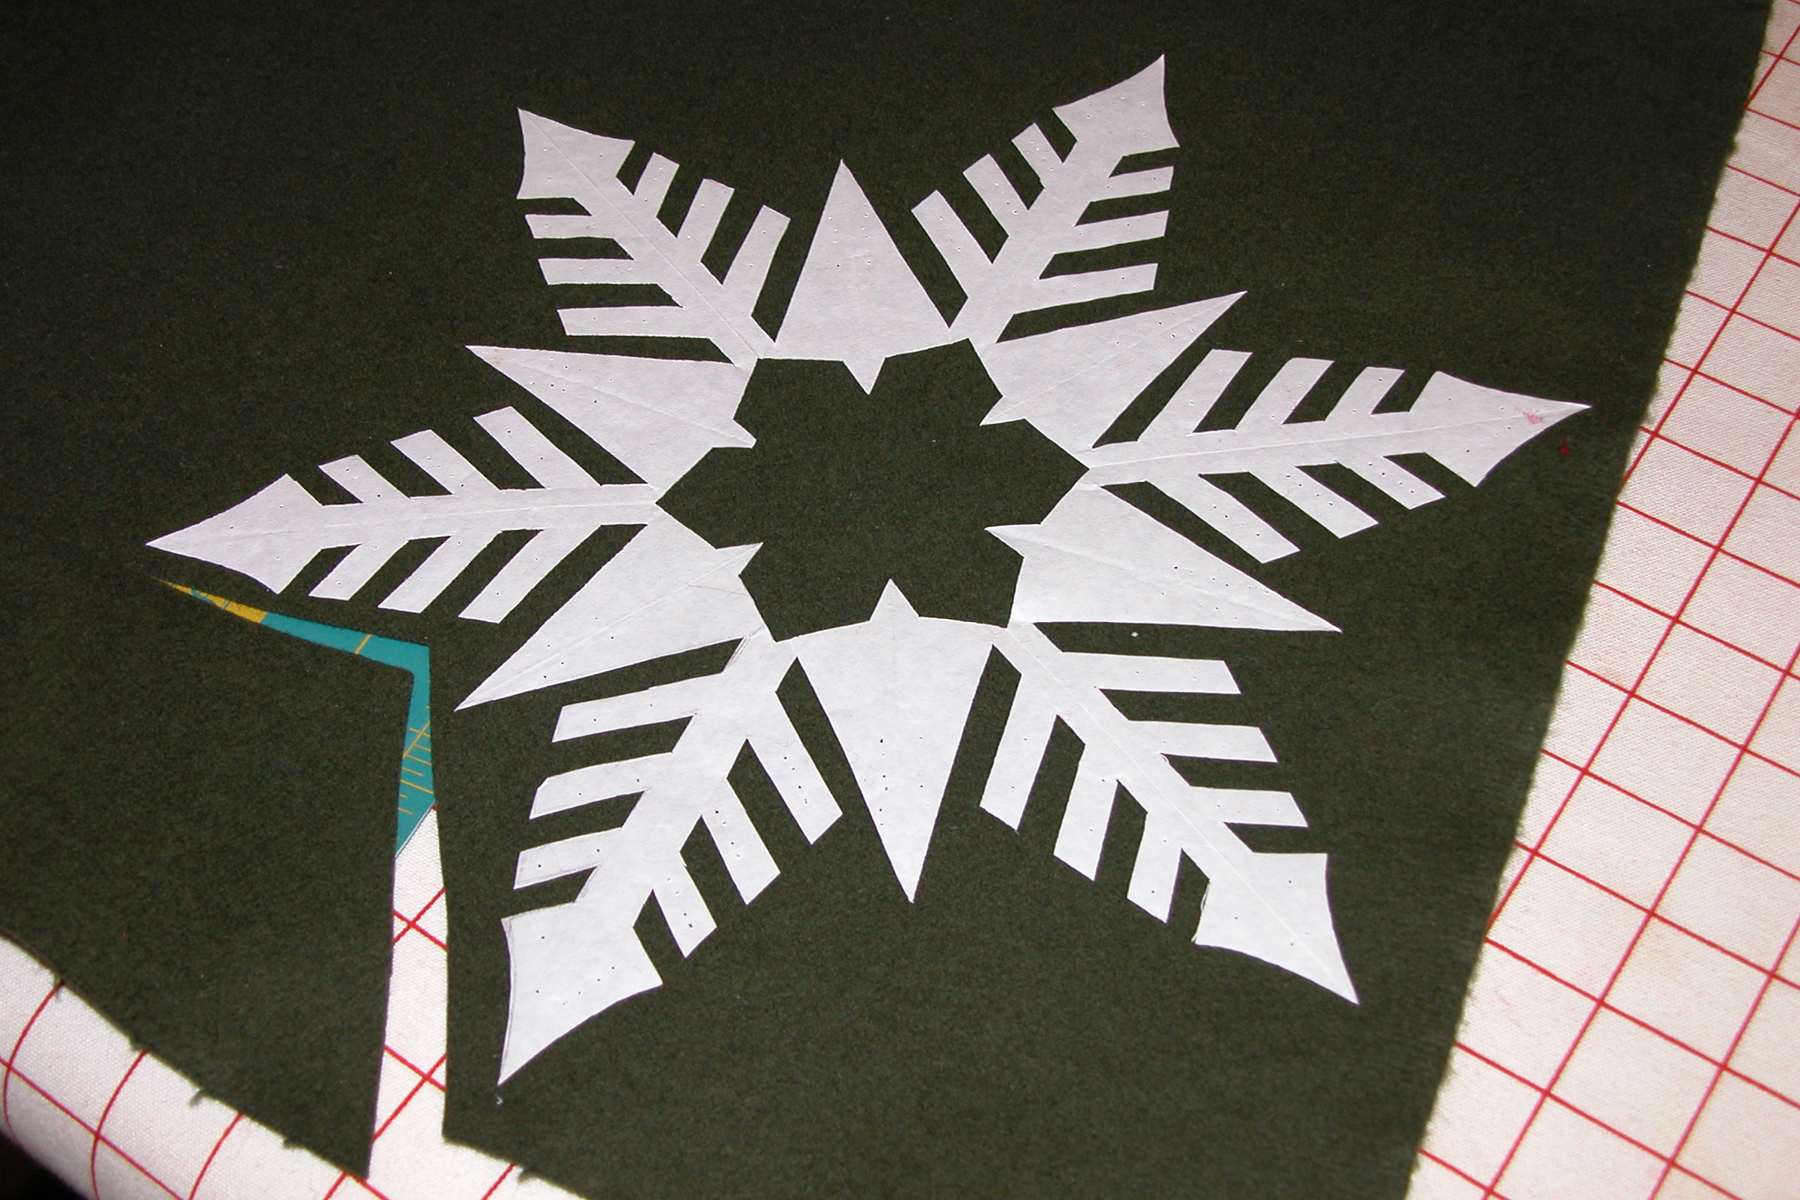
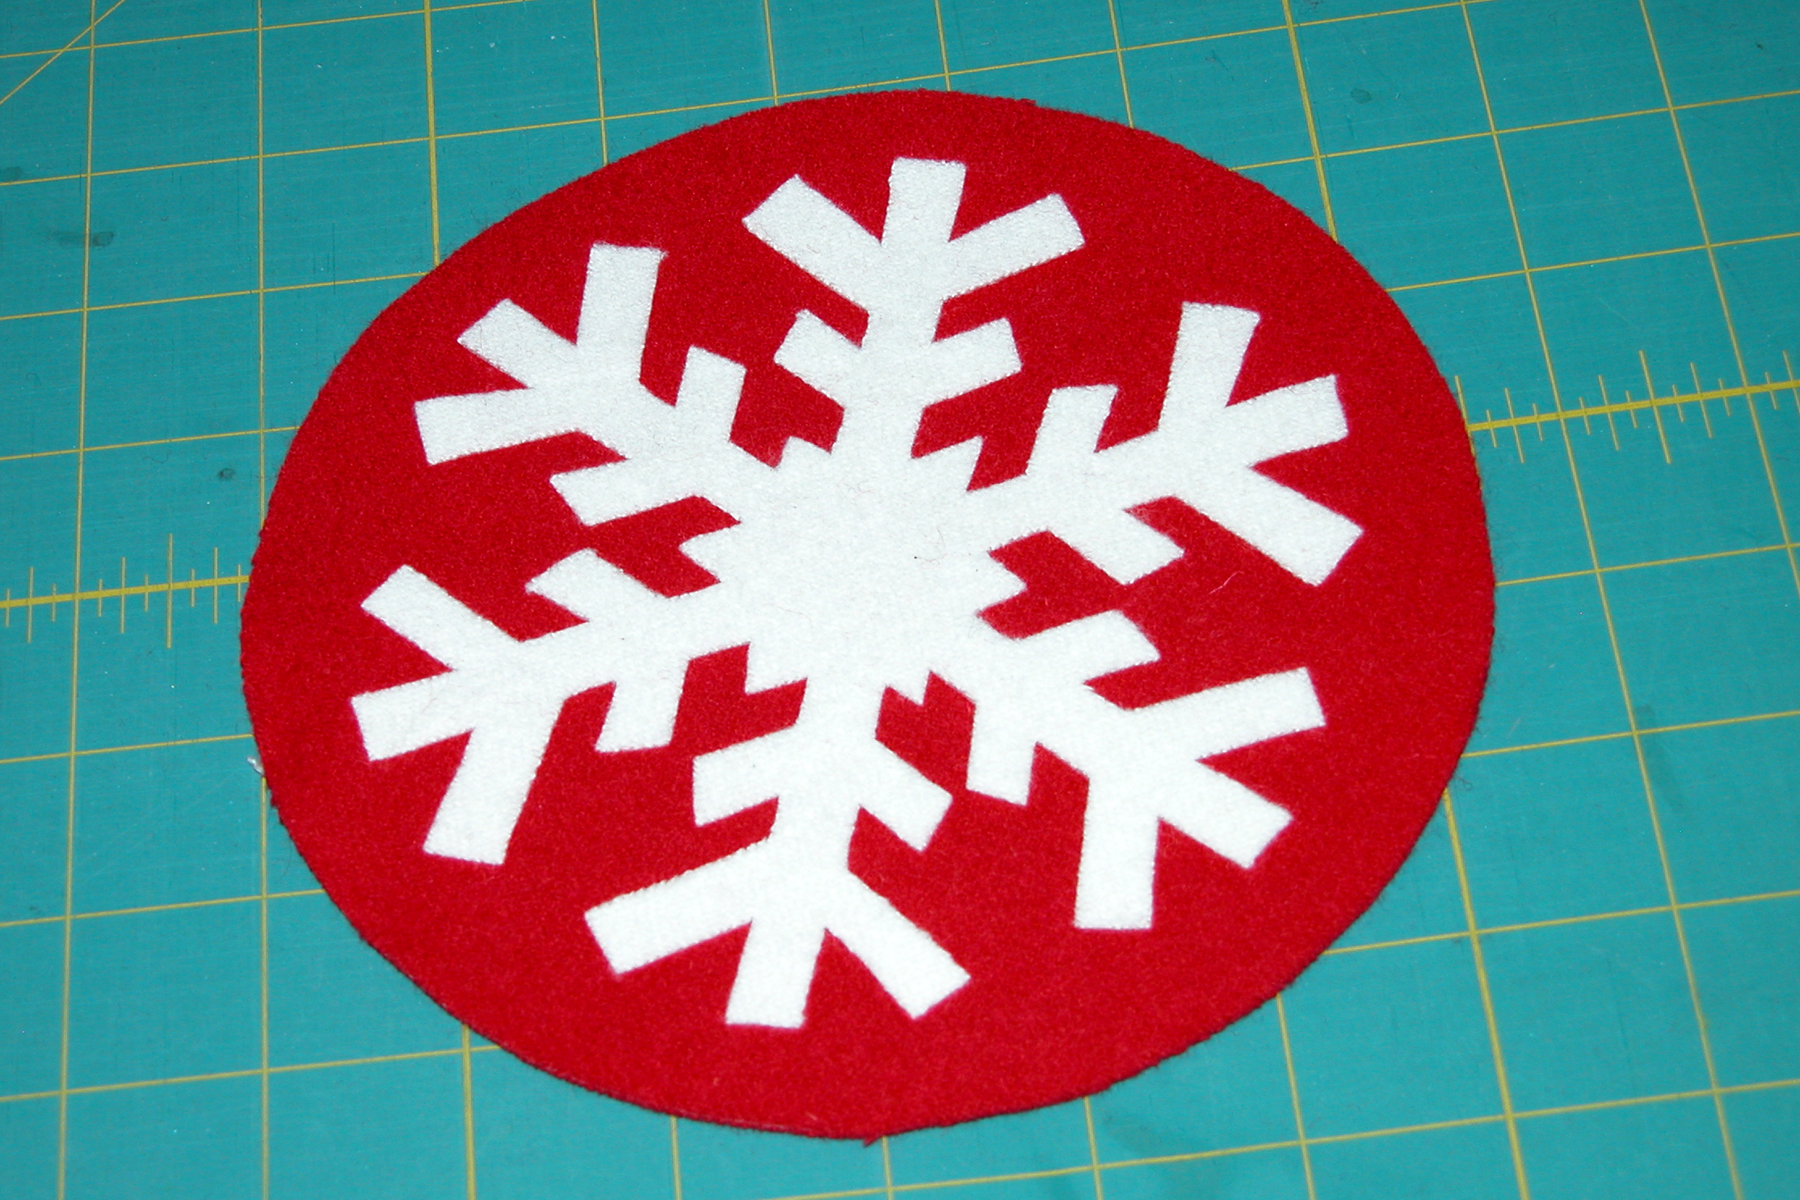
‘Rough’ cutting of snowflake applique – fusible: to use or not to use???
Since I began designing in felted woven wool and/or wool felt, I have found that there is a considerable range of opinions about the use of fusibles for wool applique. Personally, I feel that it is all about what look you want or are happy with, and how stitching on fused wool works for you. That said, I decided I would try some variations in working up my samples; while you can’t exactly ‘feel’ the finished results over the internet (maybe someday!!!), I think I can present some options that you might consider trying. As a designer and a teacher I can only benefit from experimentation, hopefully saving others from potential frustration OR presenting more possibilities! I used fusible in each of the 3 red samples – each in a different way – and I also have some photos of how I chose to use it in the larger green model. Be sure to click on the photos to get a closer view, as some of the detail in the photos isn’t really obvious until you enlarge the picture.
I want to first clarify that I considered several choices in fusibles. I have used them with wool felt – mostly to adhere the backing material to the topper (see http://www.designandbemary.com/fall-leaves-part-5-otherwise-known-as-the-finale) – but find that for the most part they really aren’t necessary; wool felt edges don’t fray and because I wash, dry and press my wool felt prior to working with it, it is usually thick enough to pass threads, etc. through the body of the felt. Therefore there would be little need for me to ‘double’ the fabric (fuse 2 pieces together) in order to be able to hide threads, etc. And to be honest, when I started, it just didn’t look very ‘user friendly’ to stitch through applied fusible! Then came felted woven wools…..while many good quality wools felt very nicely and have great clean cut edges, there are others that do not – the edges can be a bit ragged. Some may enjoy this effect. If not, fusible is your answer! I considered several kinds from what I had on hand. By process of elimination – woven fusible wasn’t ‘stable’ enough not to move with the wool, misty fuse had no paper backing making it tedious to use, pellon lt. weight dress fusible just seemed too thick and I was concerned that since it only comes in white and black that it would show around the edges from between layers – I decided to use HeatNBond Lite. HeatNBond is a double sided paper backed fusible and the lighter weight keeps any ‘bulk’ down. It is sold by the yard, so I have a ‘roll’ of several yards that I bought when it was on sale. This way I can use only what I want with very little waste. I suspect there are other similar products. In general, I have found it easy to use.
Iron the freezer paper pattern to your wool

Fusible applied to the backside of background wool
Wool background with fusible on backside – ready to be cut out
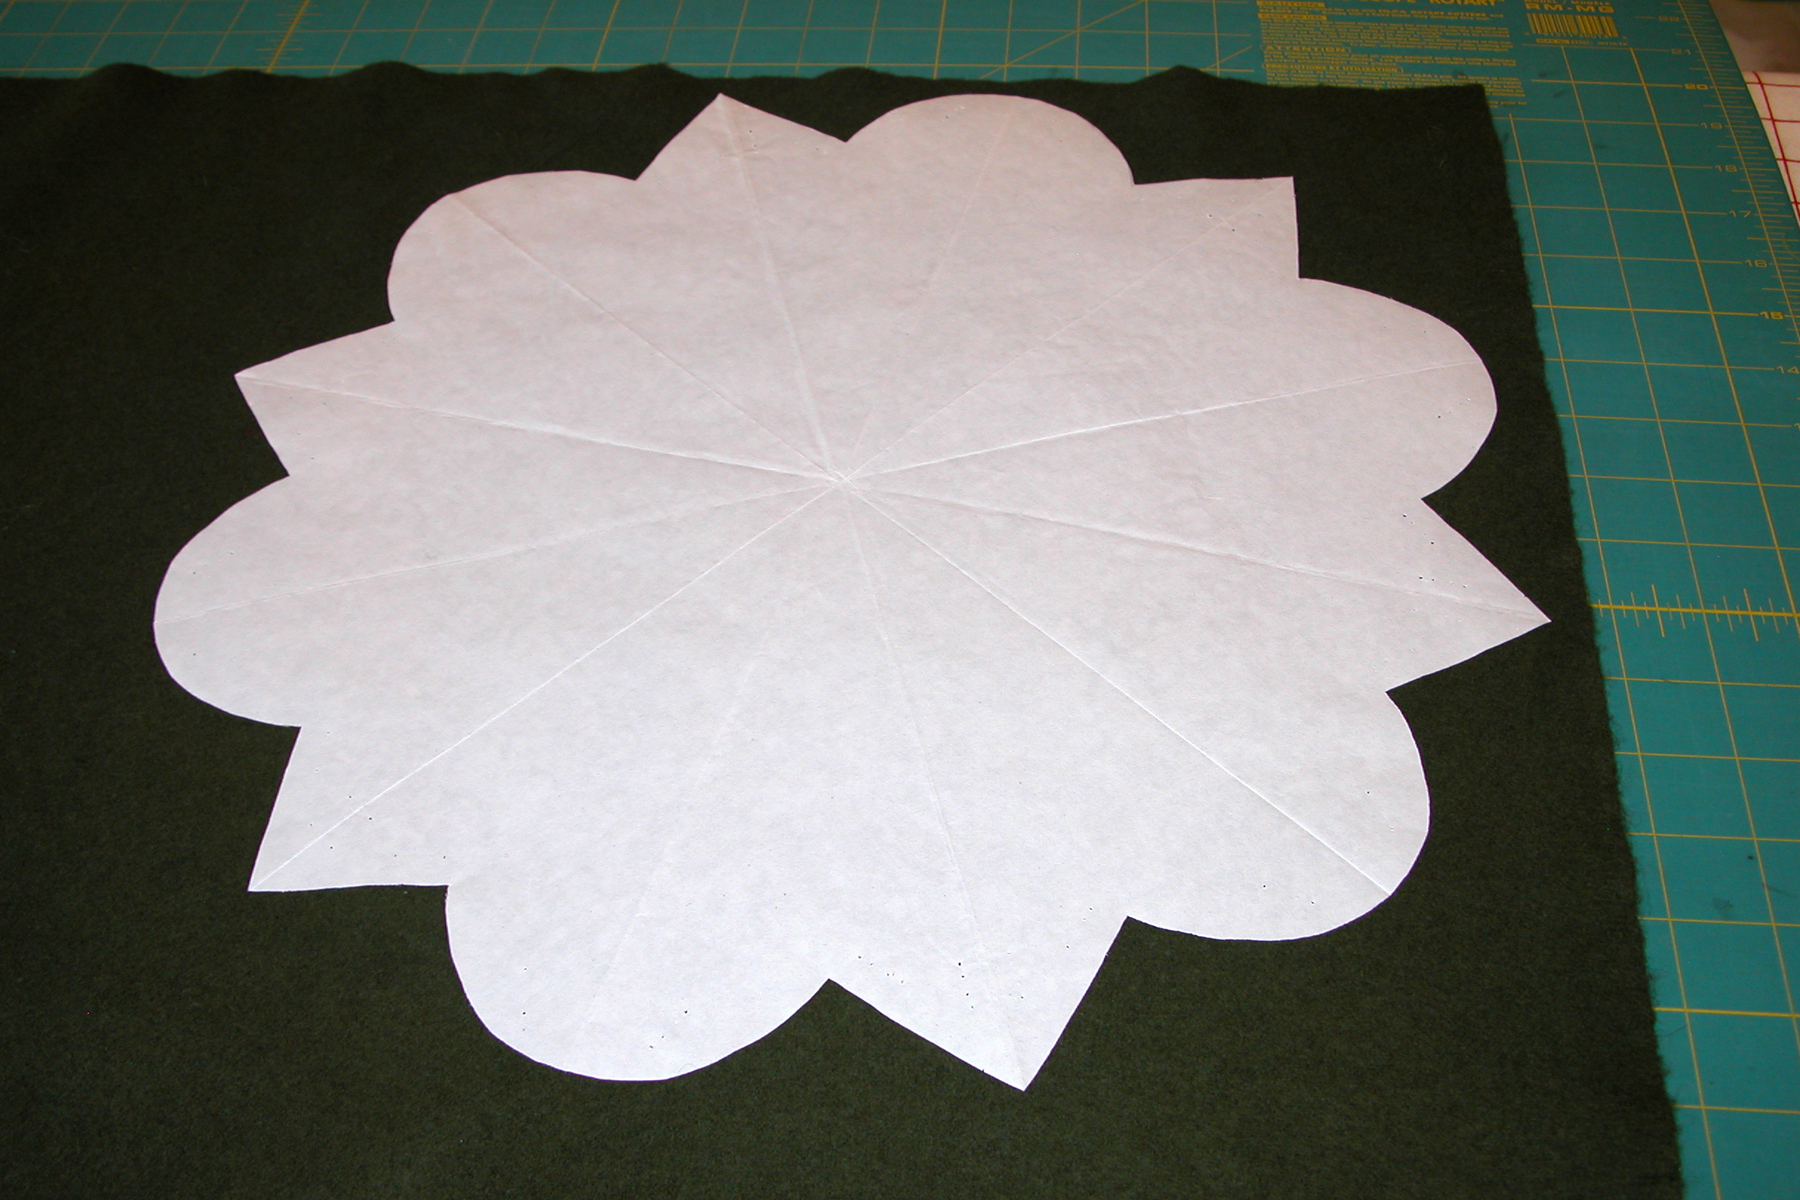
The green and white wool that I used for this topper felted really firmly and so I might have not used a fusible at all – other than I wanted to experiment. I decided to use fusible on the white background and the green background only. I did not use fusible for the top ‘snowflake’ applique nor the center ‘snowflake’ piece. In the photo – above left – I pressed the freezer paper pattern for the background to the green wool, then ‘rough’ cut the shape out. I placed this piece(right side up) on my fusible (paper side down) and cut the fusible roughly to match the shape. You can pin the pieces together if you’d like. Then, flipping the 2 pieces over, and using a fusible pressing sheet I ironed the fusible to the backside of the green wool. Be sure to follow the manufacturer’s recommendations for any fusible you use. I let it cool and peeled back the paper from the fusible (center photo above). Flipping the fused wool face up with the freezer paper pattern still in place (right photo above) I could then cut out the background piece. This process was repeated for the white wool background.

Cut out background applique laid out with paper patterns

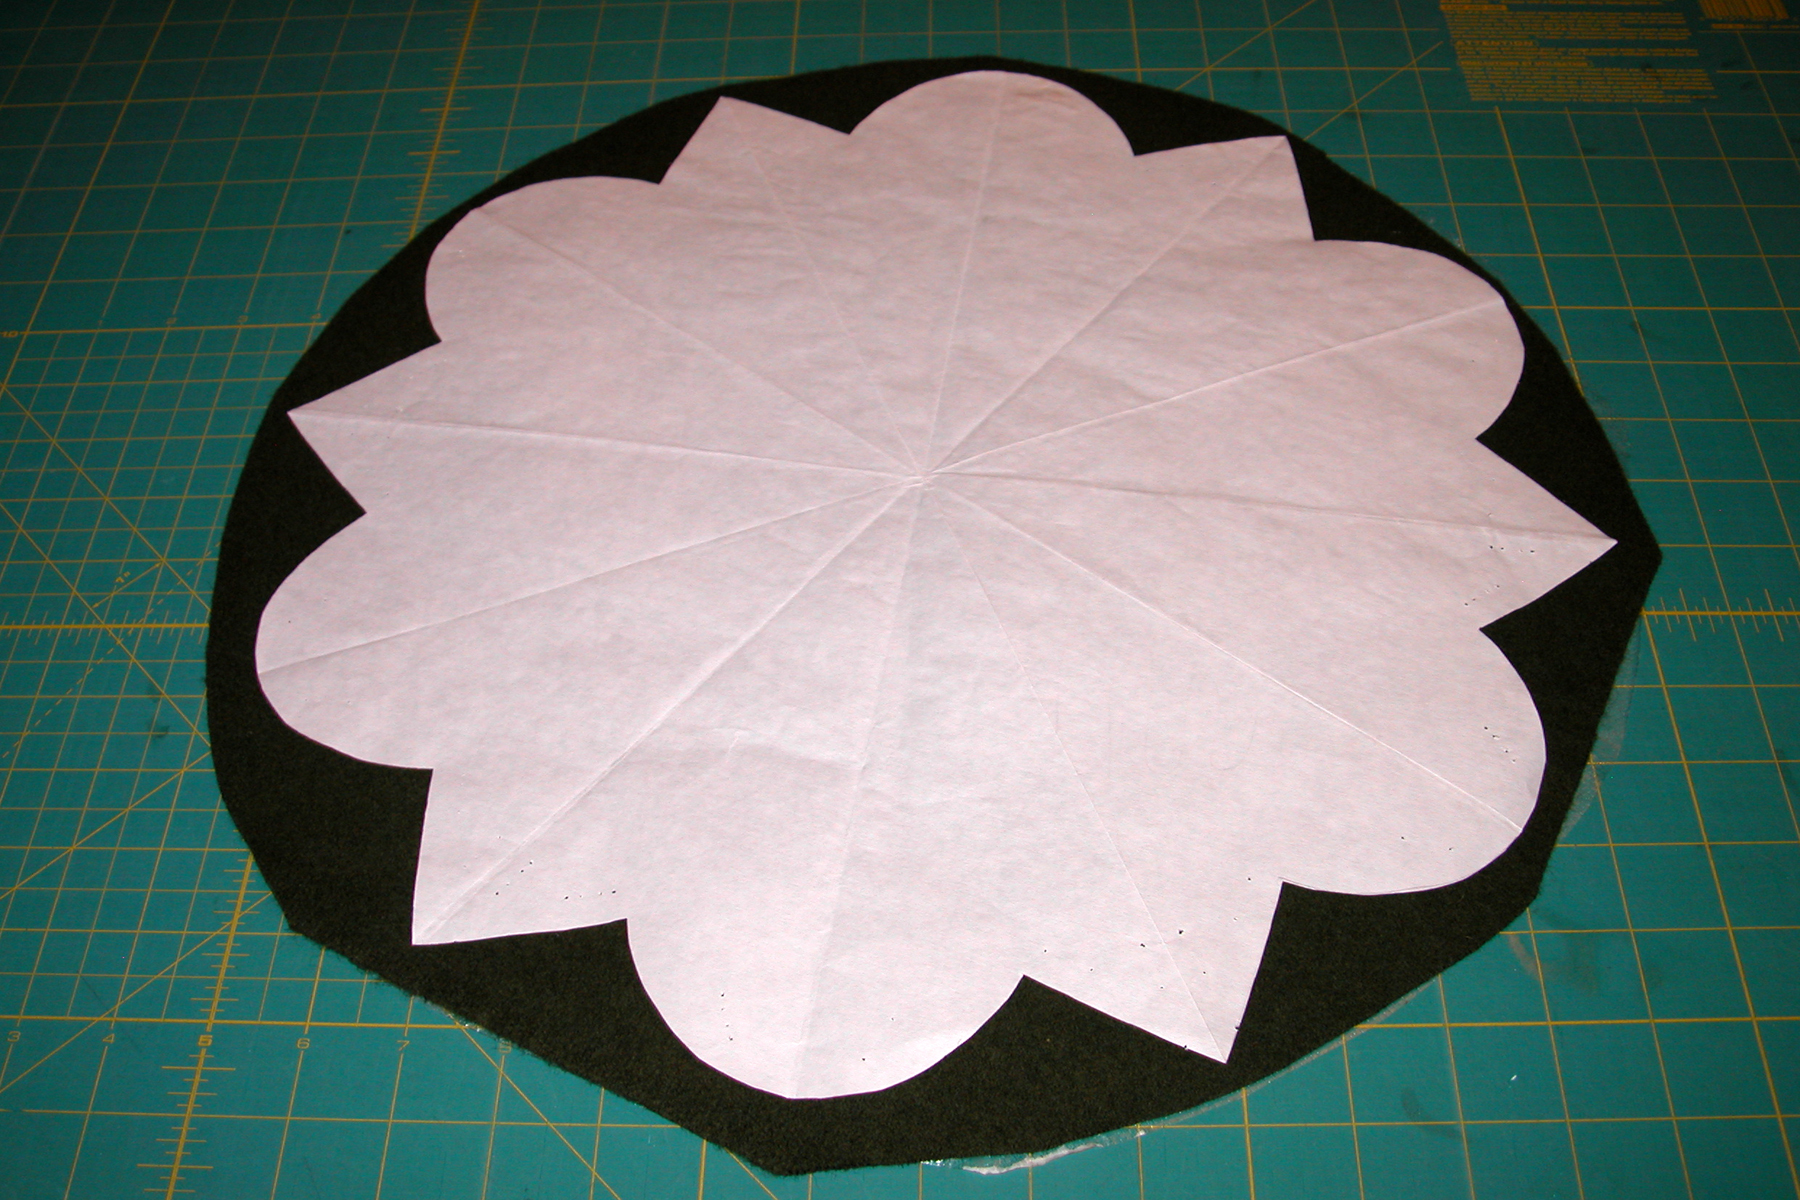
Applying fusible to white wool for the white background piece
‘Rough’ cutting of snowflake applique – fusible: to use or not to use???
I tried a little different process for two of the small, red samples. I used a less expensive red wool that did not felt particularly well and would not give me clean sharp edges, plus it was a thinner weight. I decided to fuse two layers together. This would give the piece some body, keep the edges from fraying, and would also provide a place for the threads to be hidden between the layers when necessary. In the picture (below left), I placed my actual freezer paper pattern on a piece of fusible and simply ‘rough’ cut the fusible about one inch larger all the way around. In the center photo, I had pressed this rough cut fusible circle to the back of one layer of red wool. I cut out this piece (notice it was just roughly cut out as a square), removed the paper from the fusible, placed it fusible side down on the back side of another layer of red wool and ironed the two layers together. The third photo (bottom right) shows me cutting off the unfused edges of this wool ‘sandwich,’ leaving me with a rough circle shape of two layers of red wool fused together! Not sure where my head was that day, but it would have been more efficient to do what I had done with the green model! (iron the freezer paper pattern to the wool first and then do the fusible steps.) Nonetheless, it got the job done!

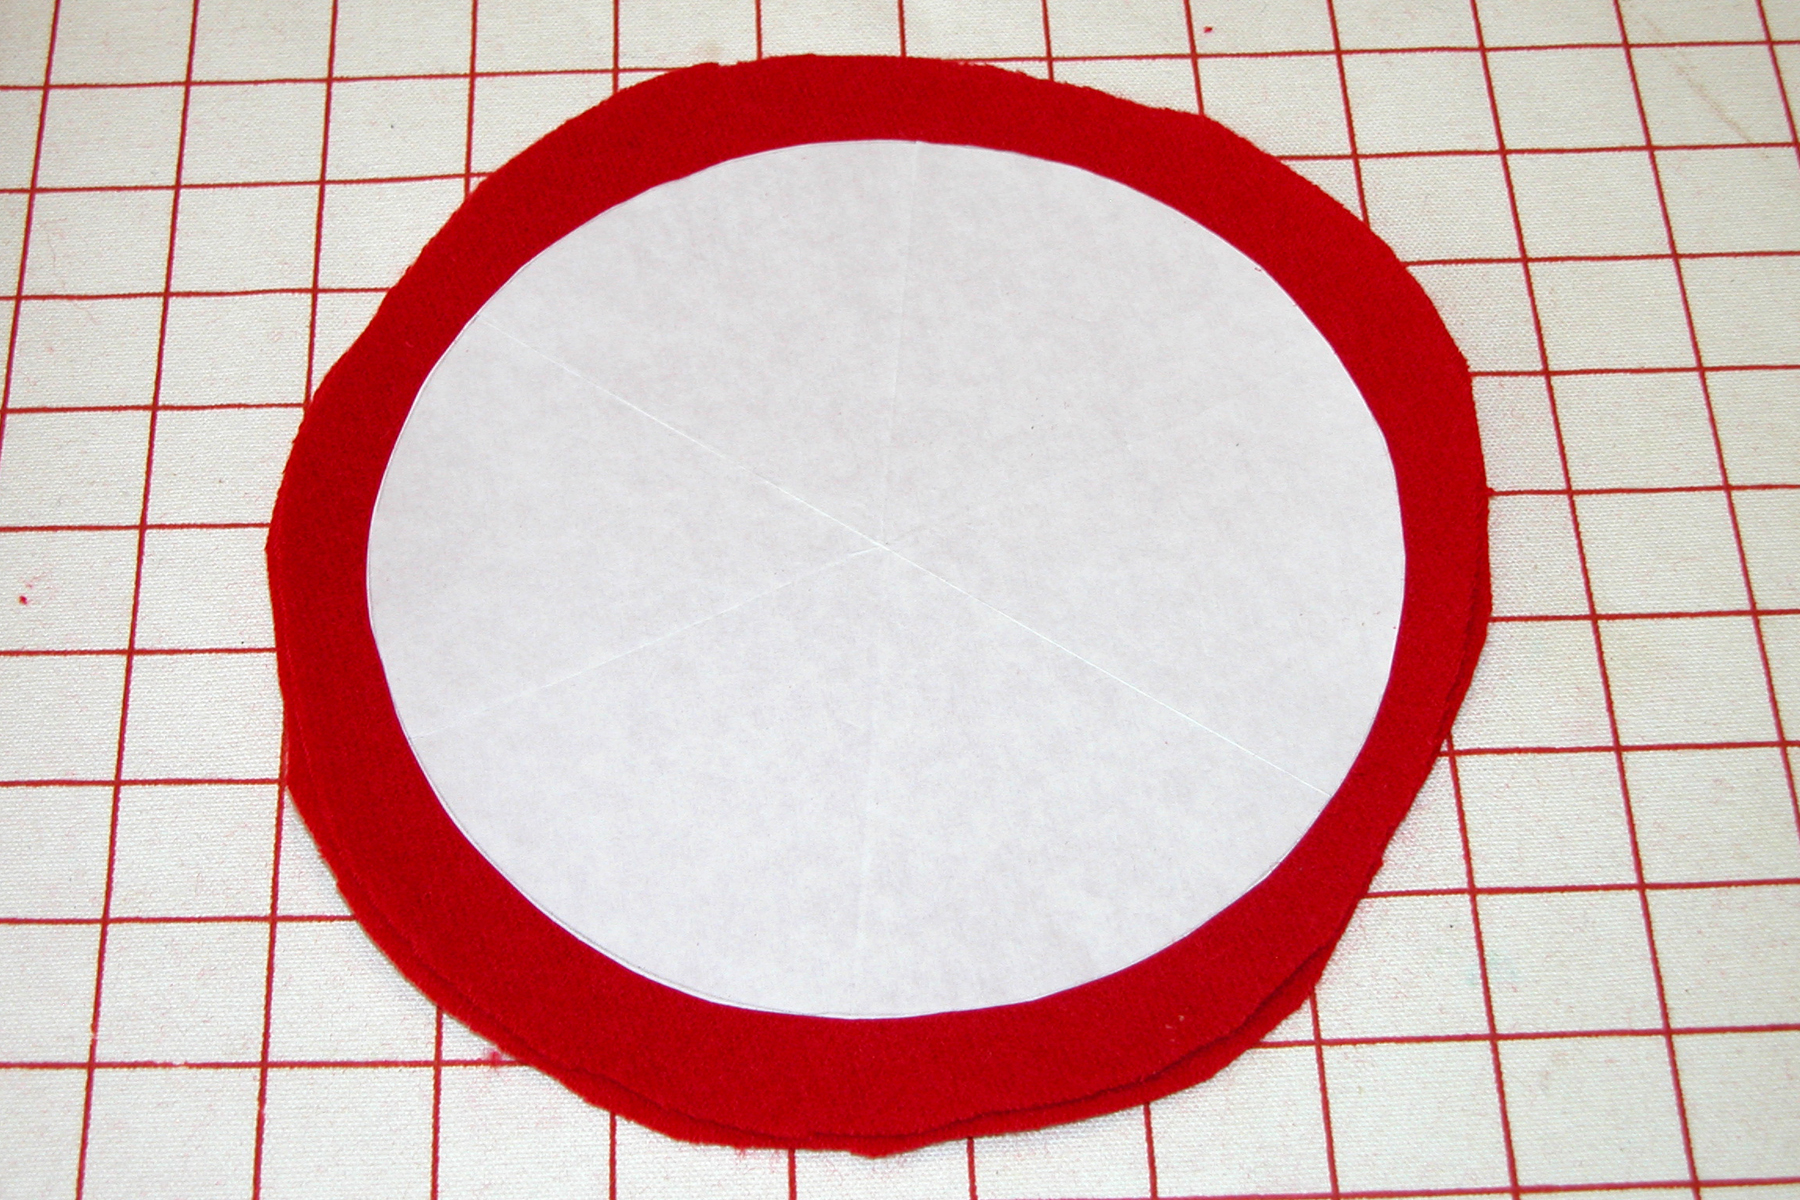
For the red samples, I placed the freezer paper pattern on the fusible.

“Rough’ cut fusible circle ironed to 1 layer of red wool background

‘Rough’ cutting the 2 fused red wool layers
After ironing the actual freezer paper background template to the fused red wool layers (photo below left), I cut out the background circle. I then repeated the entire process, making a fused double layer of white wool and cutting out the snowflake applique. The center photo – if you look closely – shows this double layer. You can also see the close up view in the photo on the right below.
I now had a sample mat that was four layers thick – two fused layers of two layers each – and while this sounds terribly bulky, it actually had a good amount of body and, as a bonus, the wool pieces were very stable and kept their shape. I did have to keep in mind that when all the stitching and embellishing was done, there would be one more single layer that would serve as a finished backing.
Freezer paper template pattern pressed onto the 2 layer fused red wool

Fused double layer white wool applique pinned to the fused layers of red wool

Close up view of the 2 fused layers of white wool
For the second red sample, I repeated the process of making a 2 layer fused red wool background. However, I made the white snowflake applique using the fusible and a single layer of wool – much the same as the green model above. And since good things come in threes, I made one more sample: this time applying fusible to a single layer of red wool for the background and making the snowflake applique of a single layer of white wool with fusible applied. All in all, I had 3 samples – one with 4 layers, another with 3 layers, and the last with just 2 layers! Two will end up with one more finishing back layer and one will have 2 more layers added. Shown below are two ready for stitching. In the photo (below right) you can see them laid out ready to go, along with the unravelled thread that I was ‘auditioning.’ I really enjoy the wonderful variety of threads that Valdani produces – all are colorfast and the hand dyed colors are endless. They have size 8 perle cotton, a size 12 perle cotton, and 6 strand floss, plus they have a 3 strand floss that comes in a ball so I feel I waste less as I can just cut off what I need – and I don’t have to spend time separating strands! YEA! (I placed a large order with them last week and can’t wait for the package to arrive!!) I had purchased a few balls at the Houston Market and decided to use the varigated thread shown in the photo for the ‘3 layer’ sample and I later chose a variegated red thread for the ‘4 layer’ sample.
Single layer snowflake applique fused to 2 layer fused red wool background

Close up of the single layer white snowflake applique fused to background
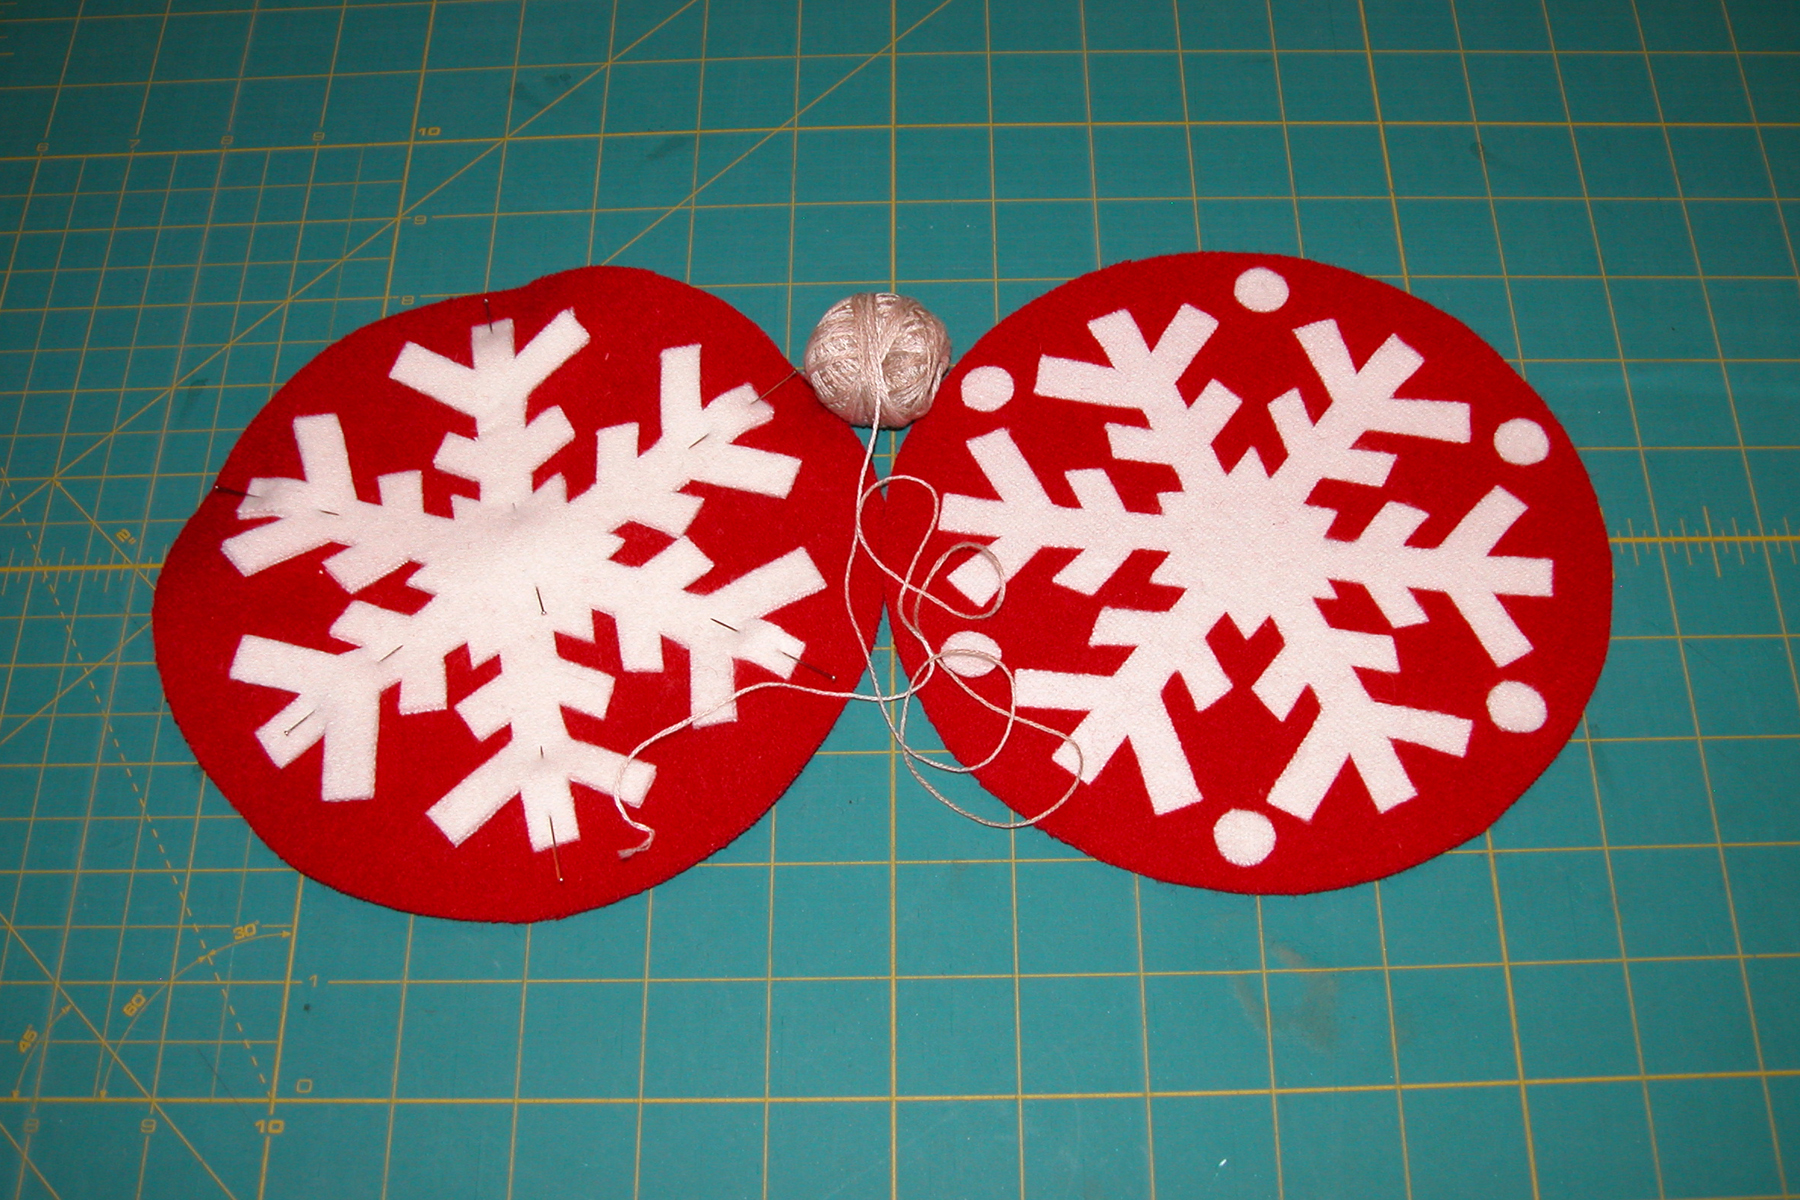
Two of the red samples laid out while auditioning thread
Stay with me! In the next blog post I’ll continue with various stitching, beading, and backing options as well as the final use of fusible to make 3 different and very neat, cleanly finished table mats.
Hi. I so enjoy watching your YouTube videos. I have learned so much.
I also stitch wool appliqué Penny rugs, wall hangings and table runners/toppers.
This is just a suggestion that you might try. I feel that this blog is confusing
And utilizes steps which are not necessary. It’s not necessary to use freezer
Paper and fusible both. I use heat’n’bond light. Trace the pattern on it and then iron
To the wool and cut out on the lines. Then iron to the background piece.
Hi Judith. Thanks for taking the time to view and to comment. It’s always good to hear someone has learned something via my experiences. I appreciate your suggestion and I’m sorry the blog was confusing. I am well aware that it is not ‘necessary’ to use both freezer paper and fusible…However, as I have been out and about over the years, I find that many stitchers are TOTALLY confused about reversing templates/shapes in patterns (and it doesn’t help that some of the many pattern writers do not clearly explain whether their template drawings are shown reversed, and/or their written instructions regarding reversal are vague at best or assume the customer has previous experience). For many stitchers, the use of freezer paper templates along with the already fused wool provides a rather easy solution to making sure the appliques are cut out correctly. I used the technique repeatedly (in my early years) – particularly for more complex designs. I have a degree in art education and taught high school art for several years – it was quite the education to realize that when giving 30 students the same set of presumably clear and concise directions, you likely might end up with 30 completely different interpretations and some of the time they could be quite revelational!!! LOL!! When writing my patterns or presenting my techniques, I work with that experience in mind. In your own statement, one might assume that you simply lay the Heat N Bond on the pattern, trace, fuse and cut out….however, without the vital information that one should trace the template shape from the ‘wrong/back’ side of the pattern/template drawing, your piece would likely be wrong (with the exception of a formally balanced design). Also, some designers now draw their templates both as regular and reversed – in which case one could simply trace all directly with Heat N Bond! Without more consistency in pattern writing, I hope that by presenting different ways to accomplish a task, I can reach more people and they can choose to use what techniques make sense to them. Thanks again for your comment! Happy stitching!