
 OK, I realize that if I don’t get a blog post done early this week, it will be a year since my last blog. Mind you, I have designed, drafted, and published/posted 6 new patterns as well as becoming involved with a few other projects, not to mention that I had a few personal UFO’s that I finally tackled and completed. Add in a few bumps in the health department and here I am today looking at the end of June 2018. It is my intent to catch up a bit over the next few weeks – just don’t hold me to it! LOL! Lots of exciting things have come my way and I will be passing these news items on to you.
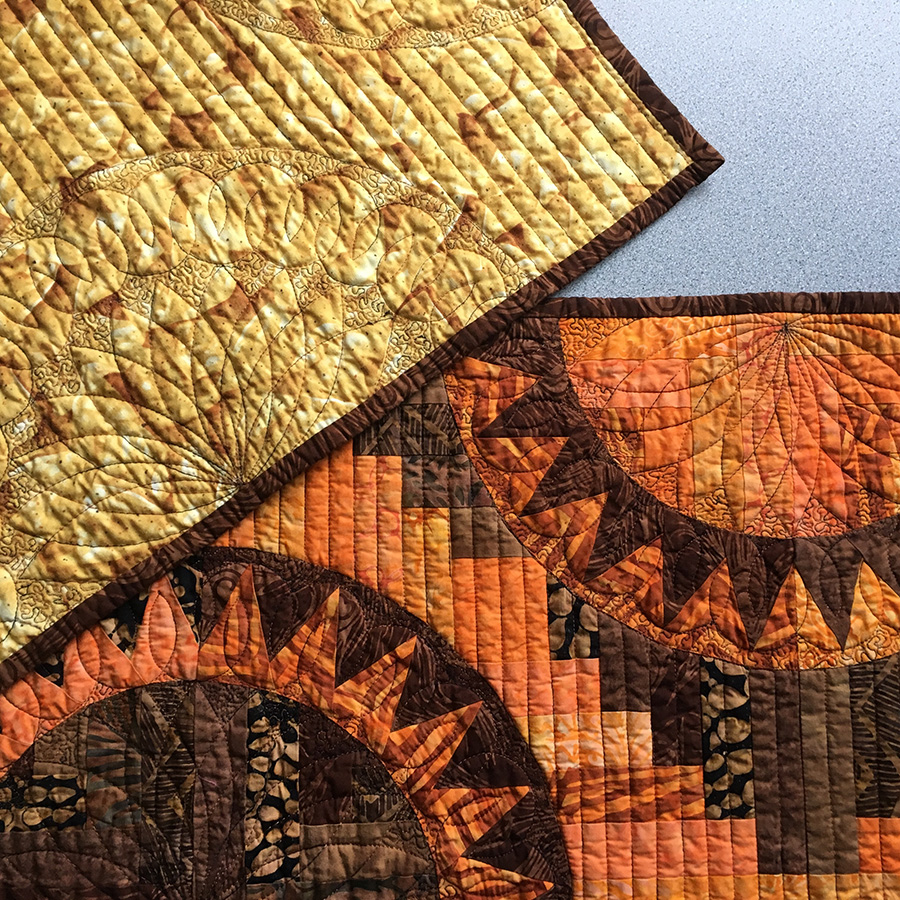
First I thought I’d share a few of my personal UFO’s and projects that I was able to get done. As some of you may know I bought a used ‘George’ sit down longarm from APQS (can I say these folks are fabulous when it comes to customer service and attention?!) about 2 years ago and this January my DH was gracious enough to convert it so I can use a foot appropriate for 1/4″ rulers – thereby I can now quilt with rulers! There’s a lot to learn about machine quilting and I’m truly a novice, but it really is fun and I have consciously made the decision to forego perfection and just have a good time. (Those of you perfectionists out there know it takes a lot to do this!) Here a few photos of some projects completed. [The photo of the quilt on the right was a quilt created just so I could practice following all the design lines in the fabric which depicts cultural tattoo design elements. It has since been quilted and as soon as I can get a photo of it I will post the final project.]


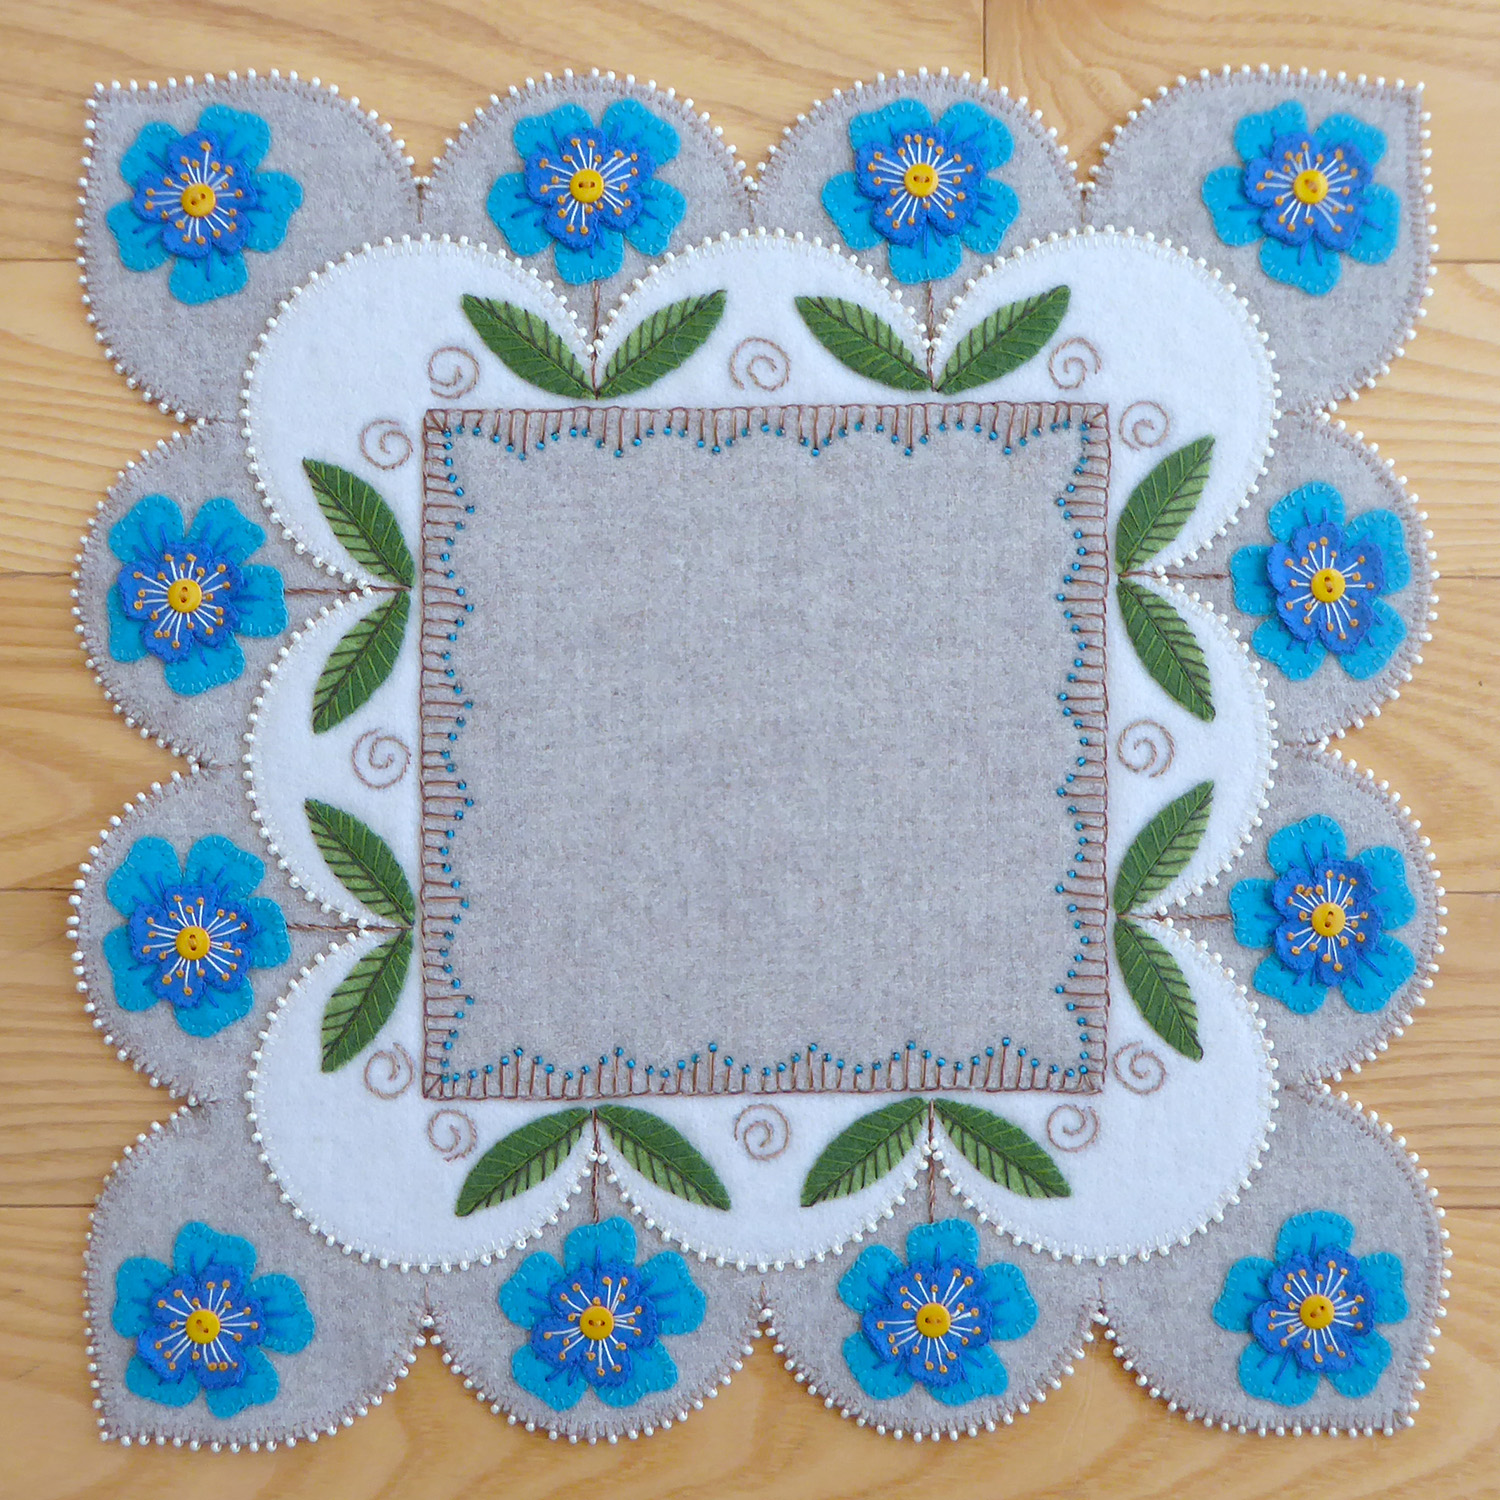
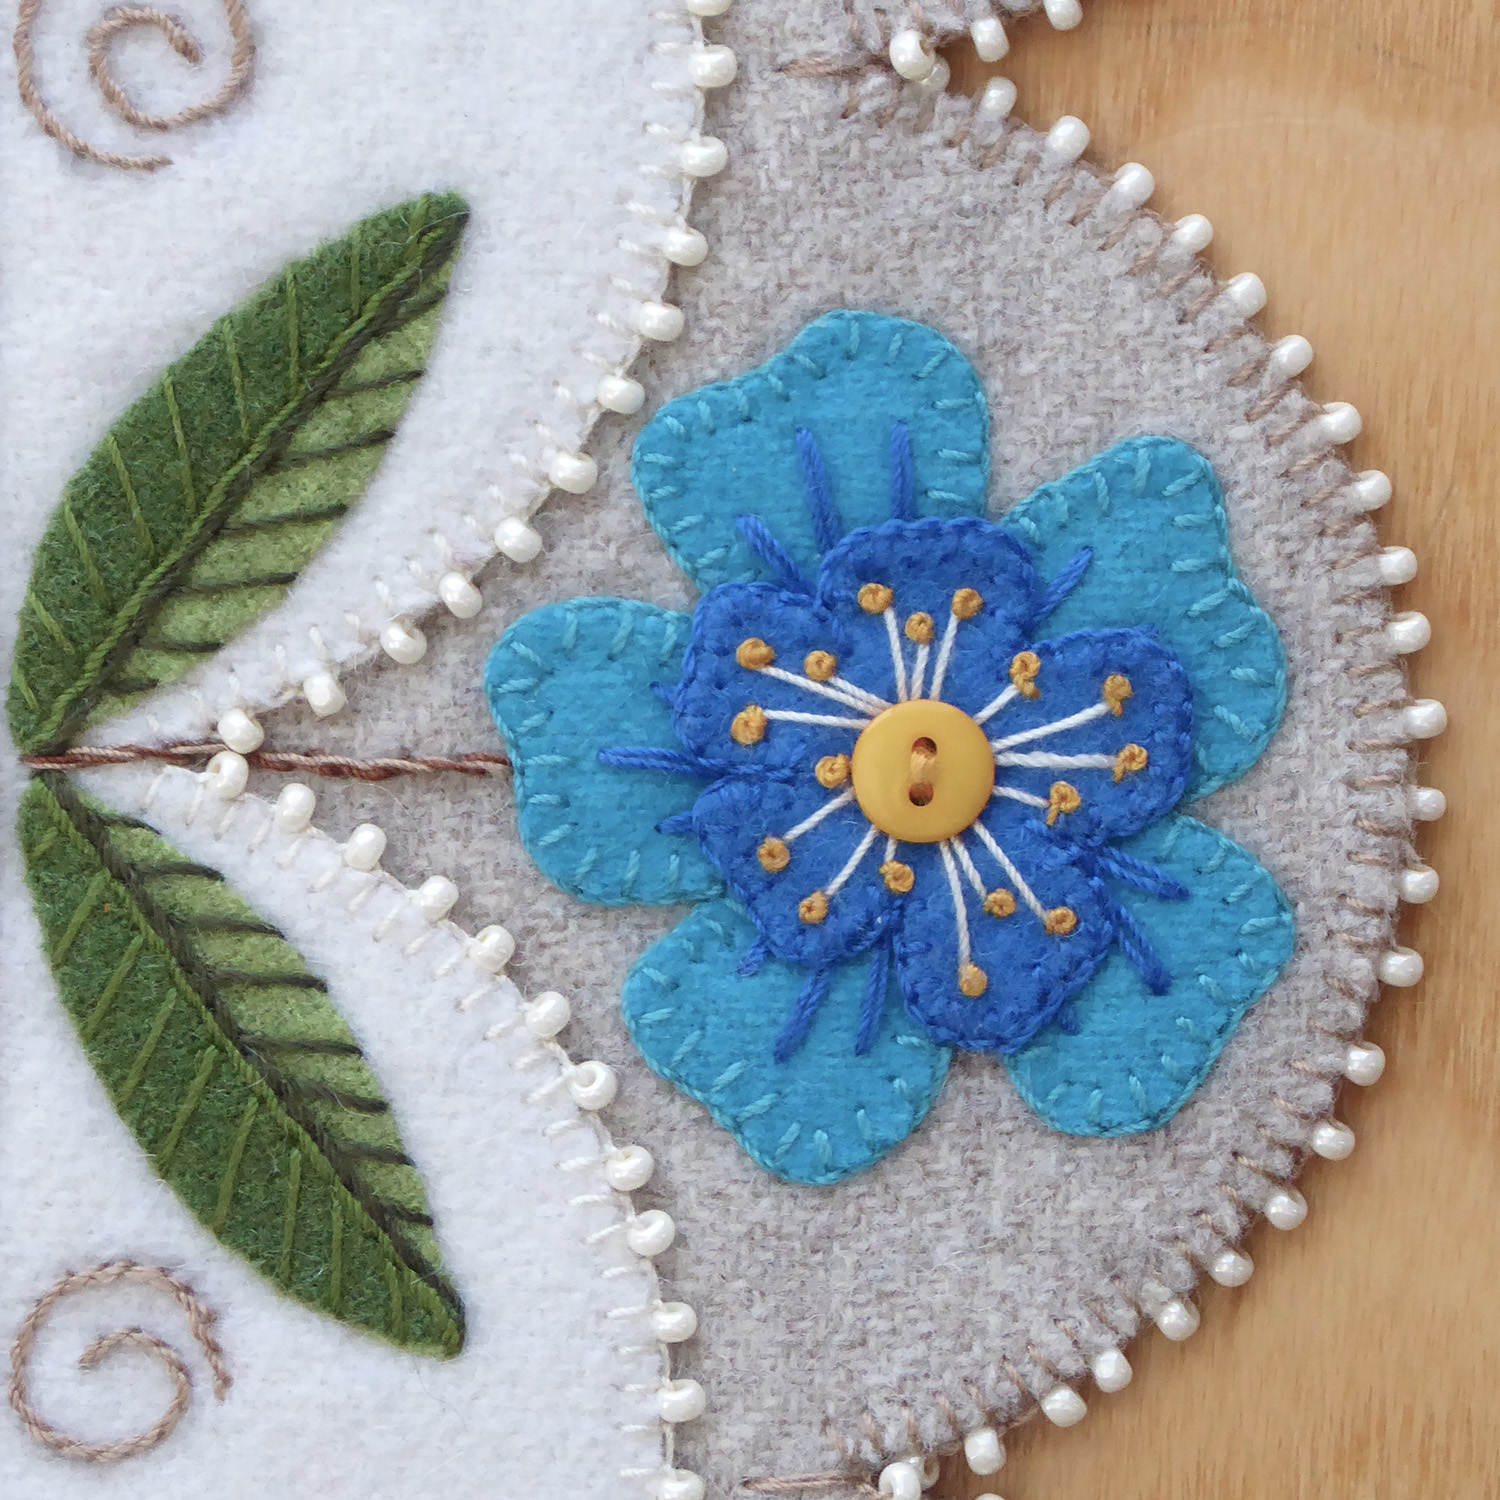
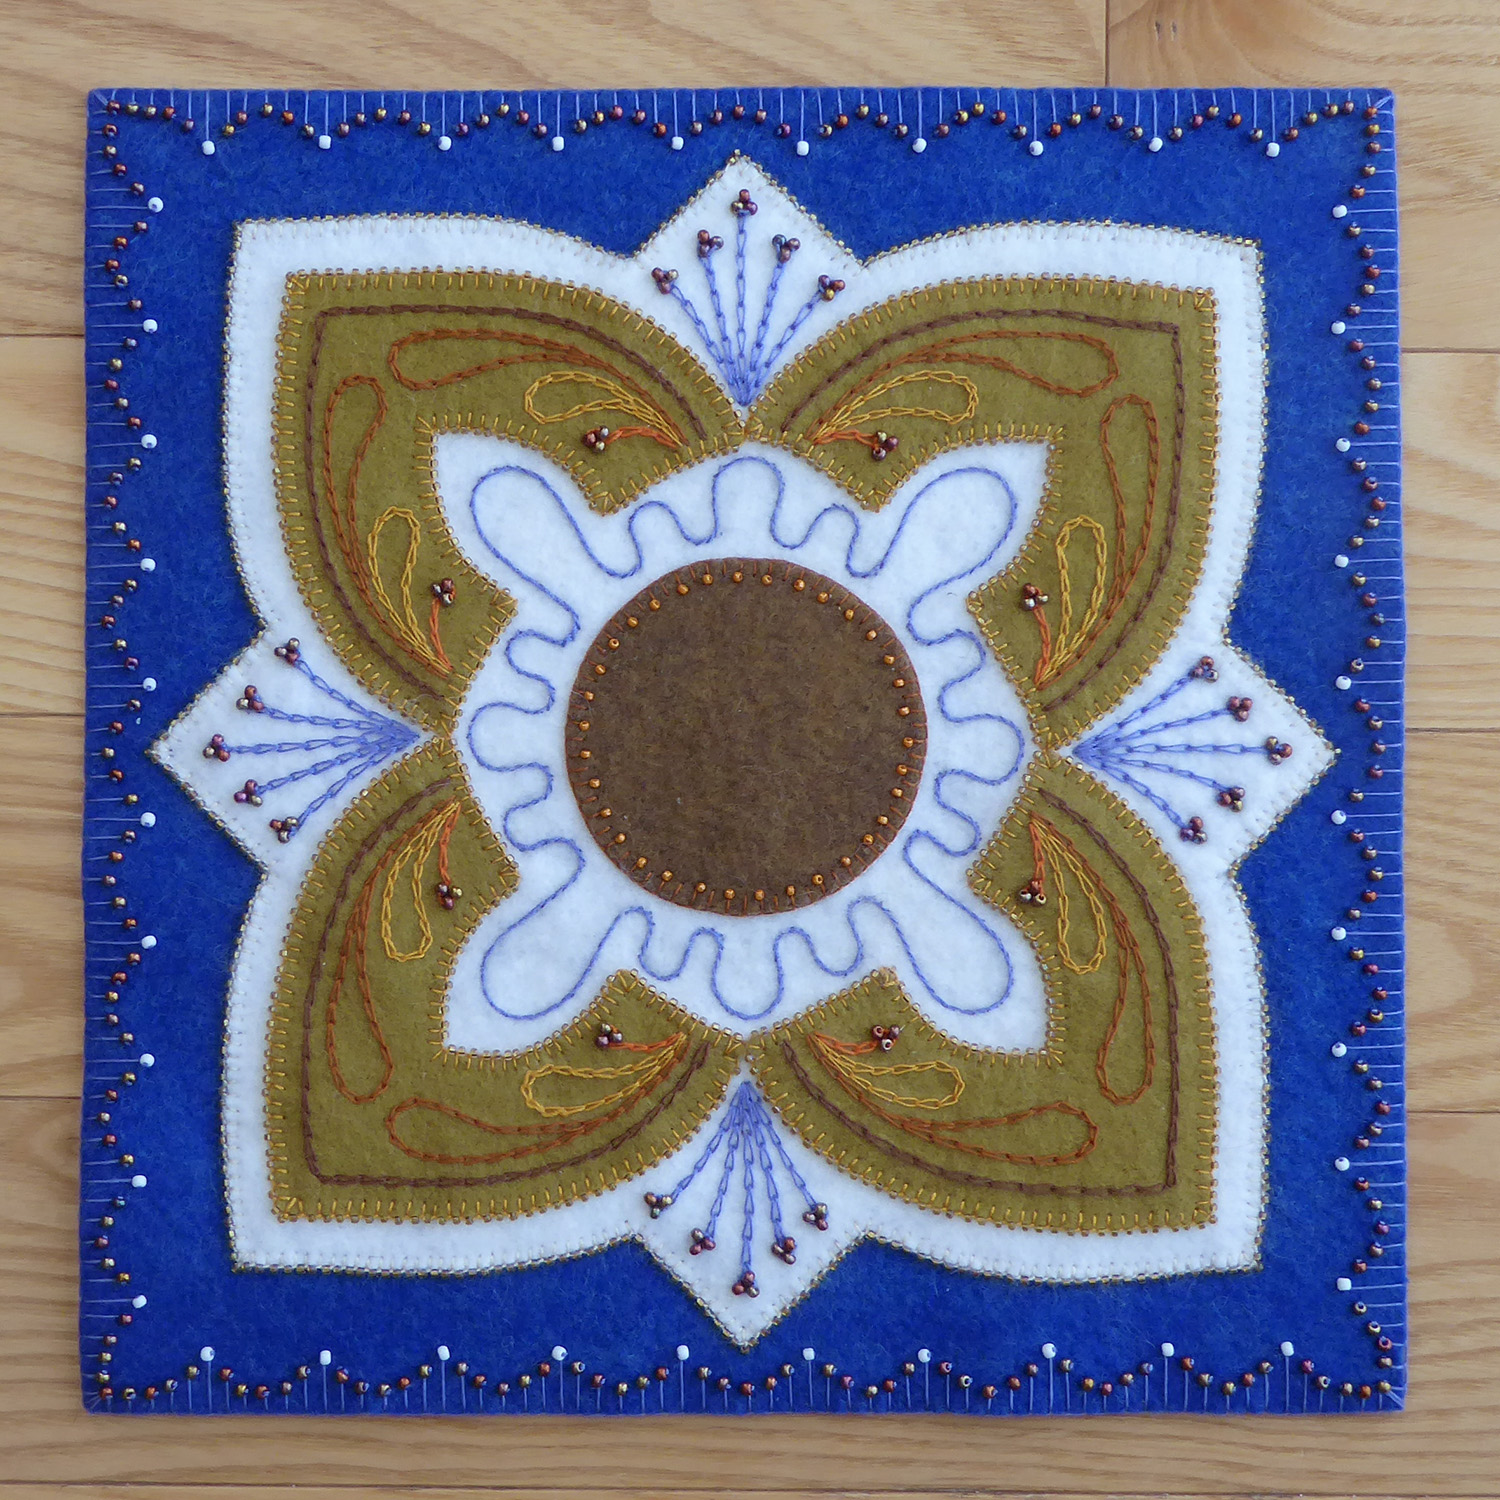
Aside from these projects I also participated in a Superior Threads ‘project’ as they were looking for wool workers to try out and use their Sew Sassy line of threads. They allowed the designers to pick out 15 spools of thread and design whatever they wanted. Despite a very short timeline and ignoring my already busy schedule, I was too intrigued not to participate. In the end I created two projects for them as I felt almost ‘guilty’ for all the threads I received [ah- and did I add they threw in the ‘bonus’ of $50 credit to my account with Superior Threads! I knew there was a reason I’ve always liked that company! 😉 ] You can copy and go to the link (there are other wool designers there as well) https://www.superiorthreads.com/feature/mary-mittelstadt-sew-sassy Check out the photos I took of the projects I did for them. The square flower mat inspired me to design and produce the pattern I call Blooms In Blue – a slightly different version and the blue/gold square mat is the small size version of my Art Nouveau Table Mat pattern.


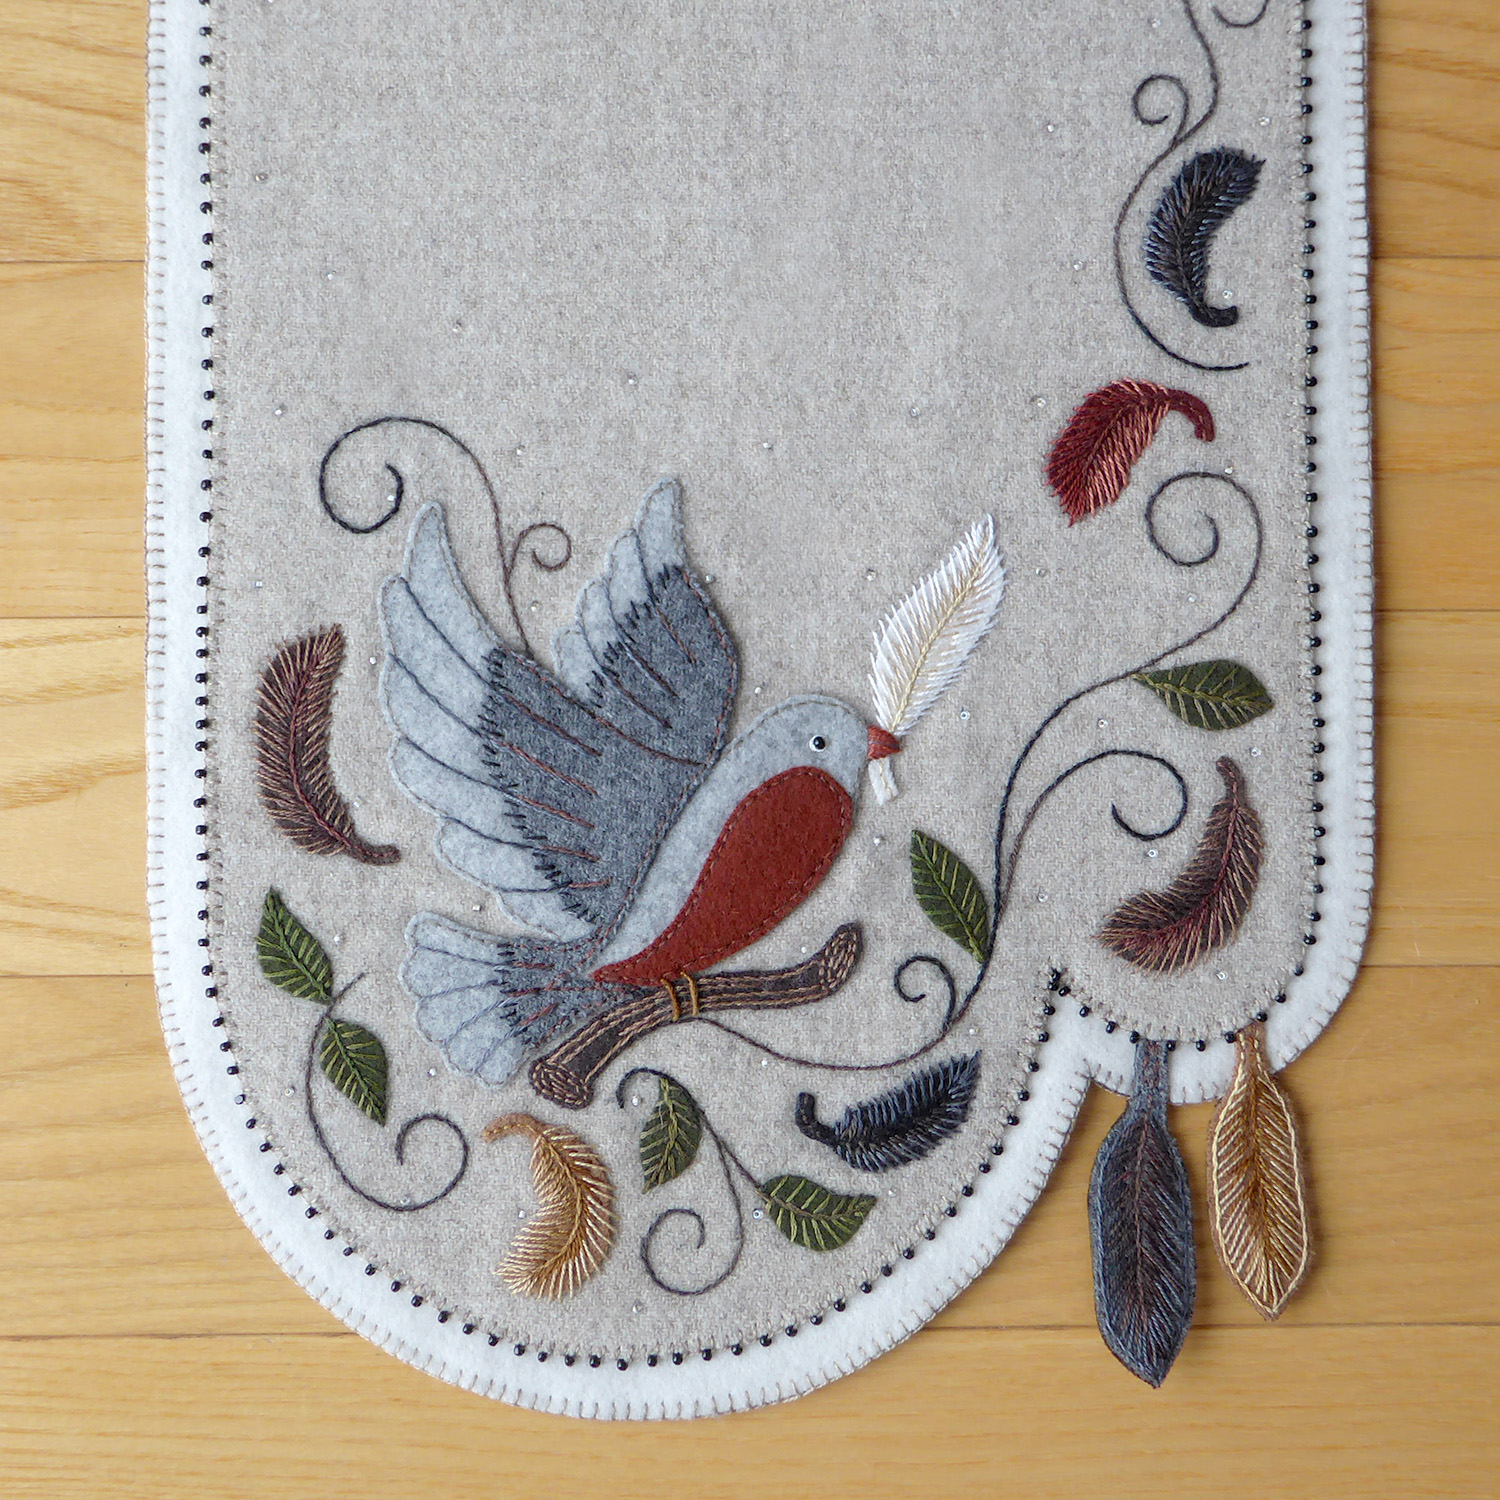
One of the patterns I created this past spring was called ‘Feather Your Nest’ – my homage to spring/summer along with the double meaning that all of us need to remember that there is a time to refresh and surround ourselves with those things that renew our hearts and souls. As usual, I like pushing the boundaries of wool design and decided that not only would it be fun to share how to use a wide variety of threads/stitches to create a ‘feathery’ feather, but it would be even more fun to have some feathers hanging off the edge of the table runner! Oh and did I add that I used a new beaded edging that is extremely ‘user friendly’? There will be more about that in another post….
For now I thought I would show the steps I used to create the feathers. It really isn’t all that difficult and feathers are actually quite forgiving of less than perfection. If the idea of too much stitching/too little time overwhelms you, then feel free to use a regular blanket stitch around the feather shape and/or leave off the ‘hanging’ feathers. Please remember as you read these steps that complete instructions and illustrations are included in the pattern – hopefully these visual references will add to your understanding of how these feathers are created.
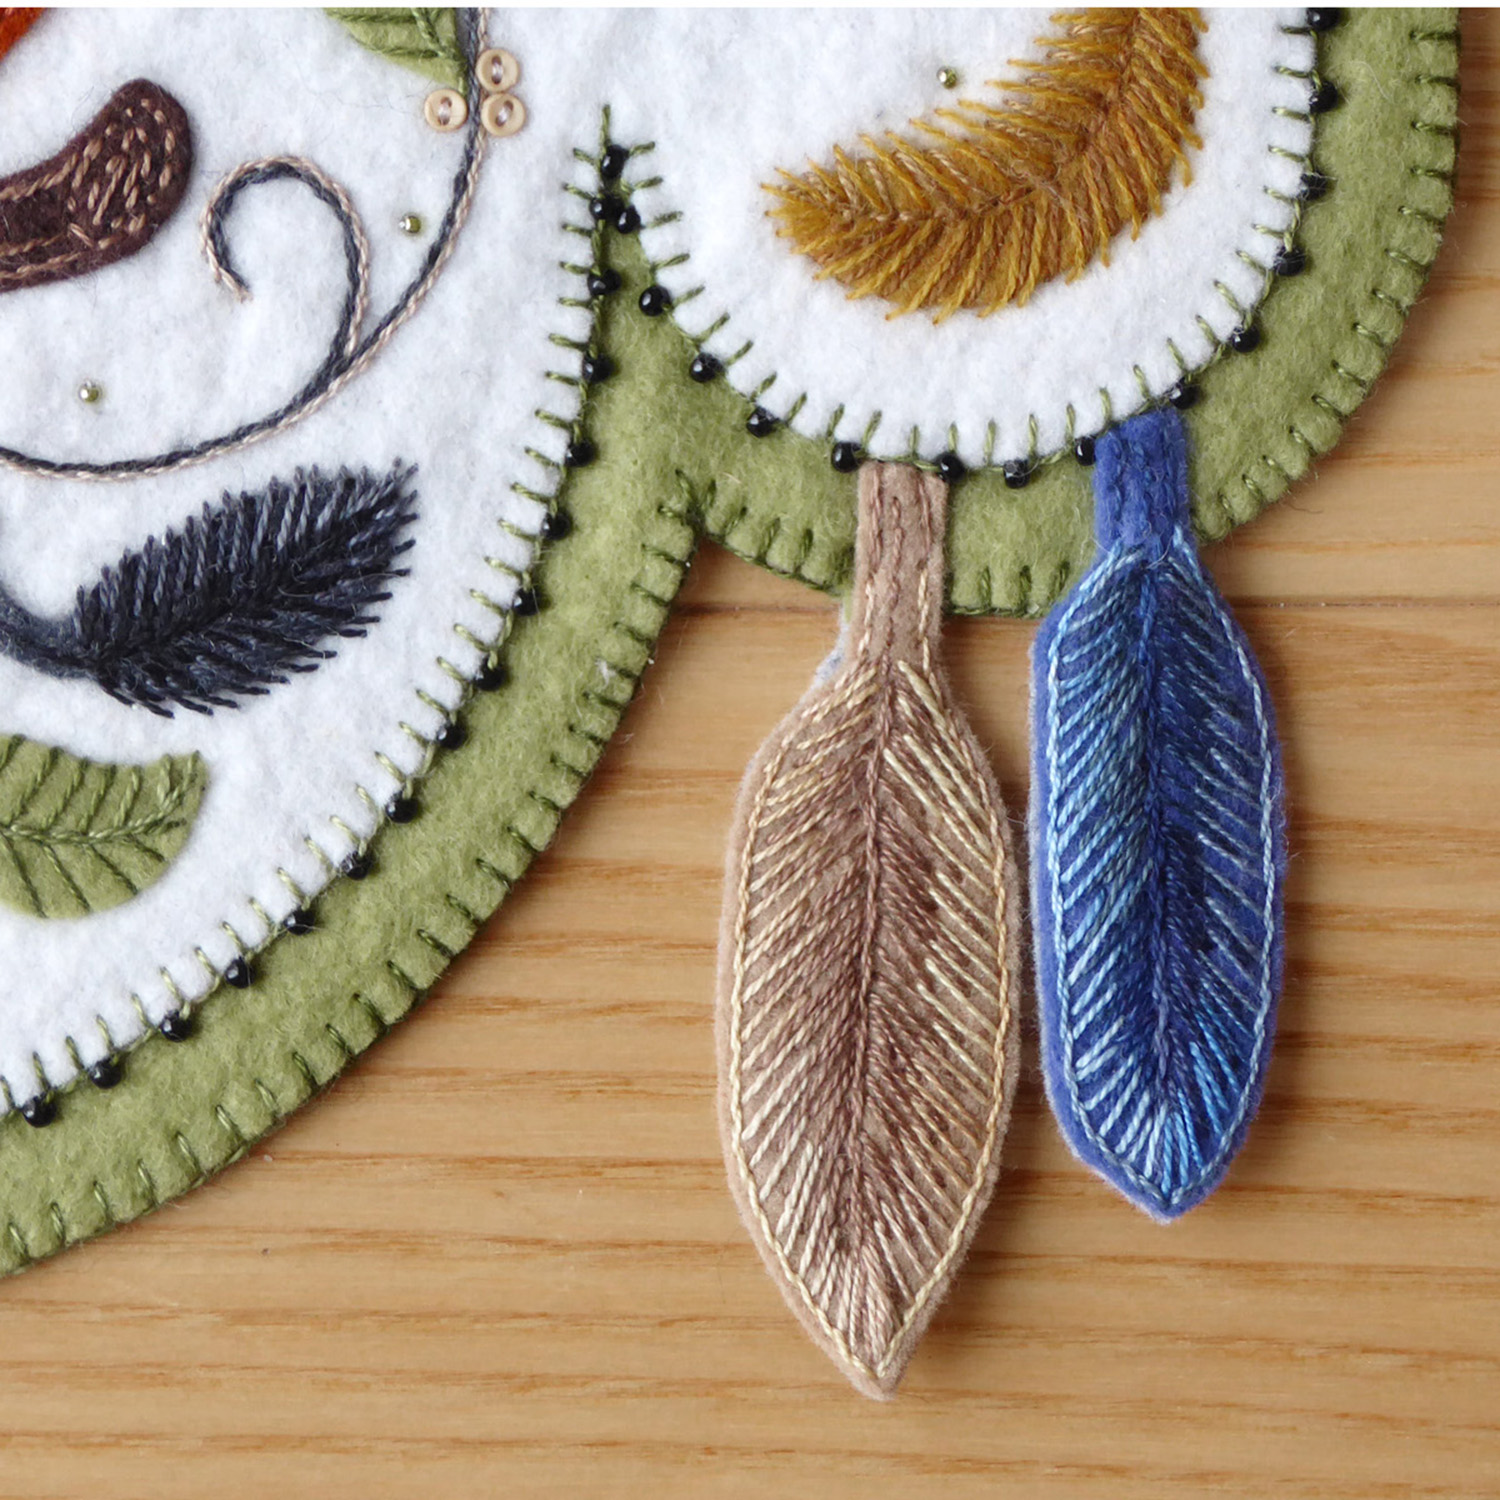


While the first photo shows a close up of the ‘hanging’ feathers, the other two photos above show the feathers stitched flat on the runner. Basically, an applique feather shape from the pattern is cut from your wool or felt; it is then trimmed a scant 1/8th inch all around the outside (not the ‘stem’) so it will look like a very skinny feather. Applique the feather to the background by using a stem stitch for the center and then adding two rows of straight stitches of various lengths that extend out from the main stem stitch. The pattern has complete directions and illustrations, but the first row of straight stitches (closest to the center stem) will be of darker colored thread (I love using variegated threads!) while the second row of straight stitches will be of a lighter color and the stitches will begin about 1/8th inch away from the center stem stitch and extend about 1/8th inch beyond the edge of the wool applique. This sequence is similar to the process in the photos below as I show the construction of the ‘hanging’ feathers.
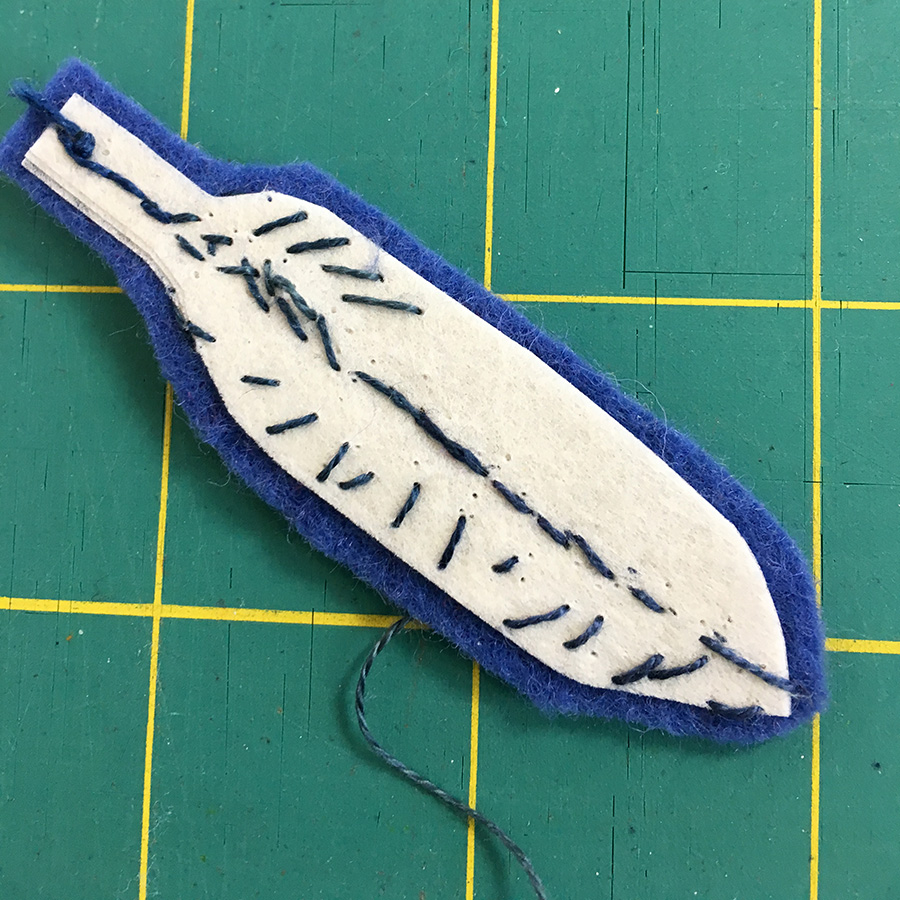
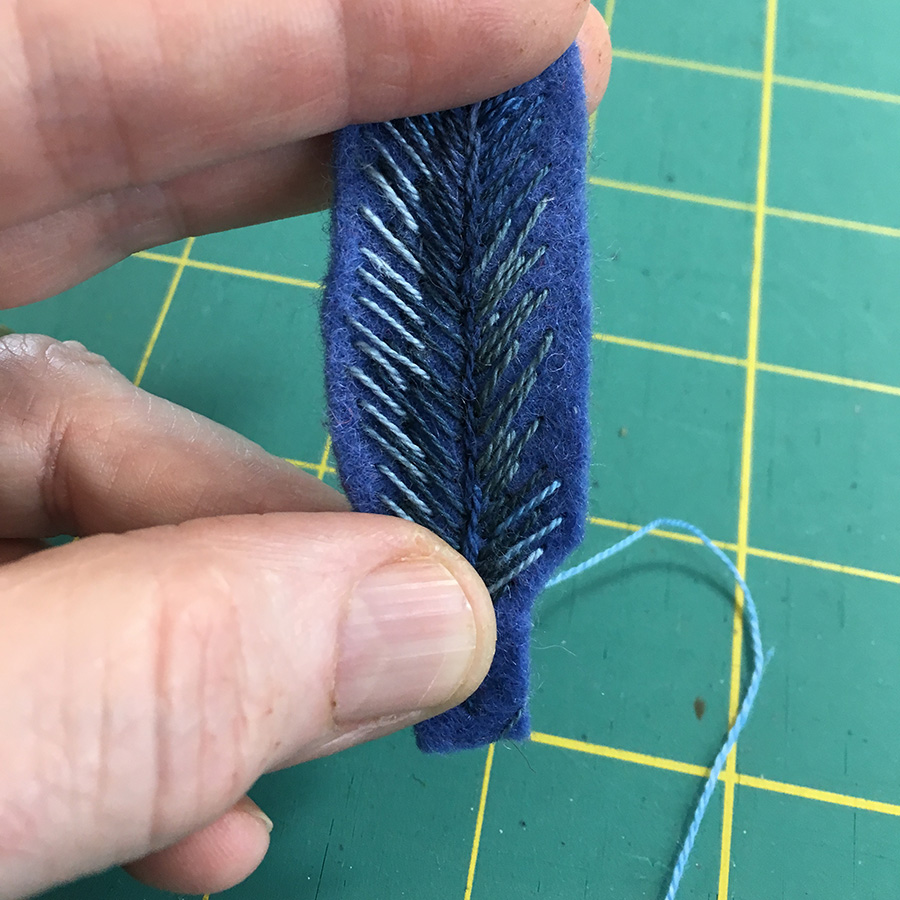
To create the hanging feathers, an applique feather shape is cut from wool/wool felt. The hanging feathers appliques are used full sized as on the template sheet of the pattern. You will only need to cut one of each as the backing will be provided when you back the entire runner. The feather applique is then backed with either a very heavy interfacing such as Peltex 72 or – several layers of embroidery tear away stabilizer. This backing is cut slighty smaller than the feather and perfection is not necessary when cutting it out – just make sure that it will not show on the edges of the feather. (photo 1) Use a waste thread to crudely baste the backing to the wool feather. Stitching from the right side, using your darker thread for the center ‘stem’ use a few back stitches to secure the ‘top’ of the stem and then switch to a stem stitch to complete the center line. (photo 2). As a general rule, do not stitch beyond about 1/16th inch of the outside edges of the feather. Once the center line is stitched, begin making various lengths of straight stitches along each side of the center line – notice that these are not tightly packed stitches not do they extend to the outside edges of the feather applique. (photo 3) Be sure to click on any photo to get a close up view! [Also please note that I have used photos of both colorways/materials.]


The 1st photo in the second row shows how the back of the feather appears with the stitching. All this will be hidden by the backing so no worries. The next 2 photos show the outer round of straight stitches – done in slightly lighter color(s) and in a similar ‘irregular length’ pattern. These stitches are interspersed in the first row of stitches – not always starting at the center line, but extending to within a generous 1/16th of the outside edges of the wool feather.
With the feather appliques stitched, lay them out to place them on the runner. If you have done the beaded edging on the lighter colored top background (white or oatmeal), try to locate the stem of the feathers in between the beads. (photo 1) Remember that these feathers do not have a fabric backing yet – that backing will be cut along with the backing for the entire runner. Pin the feathers stems in place and use a one or two back stitches (in a matching thread color) to secure them. Since the pattern recommends using paper backed fusible when cutting out the top runner backgrounds, the entire runner can now be laid out on top of the backing fabric (which is placed with the wrong side facing up). Pin the loose ‘hanging’ feathers to the backing and proceed to fuse the top to the backing. I found it helpful to also place a small amount of fusible on the back of the feathers, but this is optional – a few dots of glue will also work – just something that will help keep the feathers in place when you trim the backing to match the top runner. You will need to trim the backing around the feathers as well. It’s a bit putzy and the fusible /glue helps. All these instructions are illustrated in the pattern.

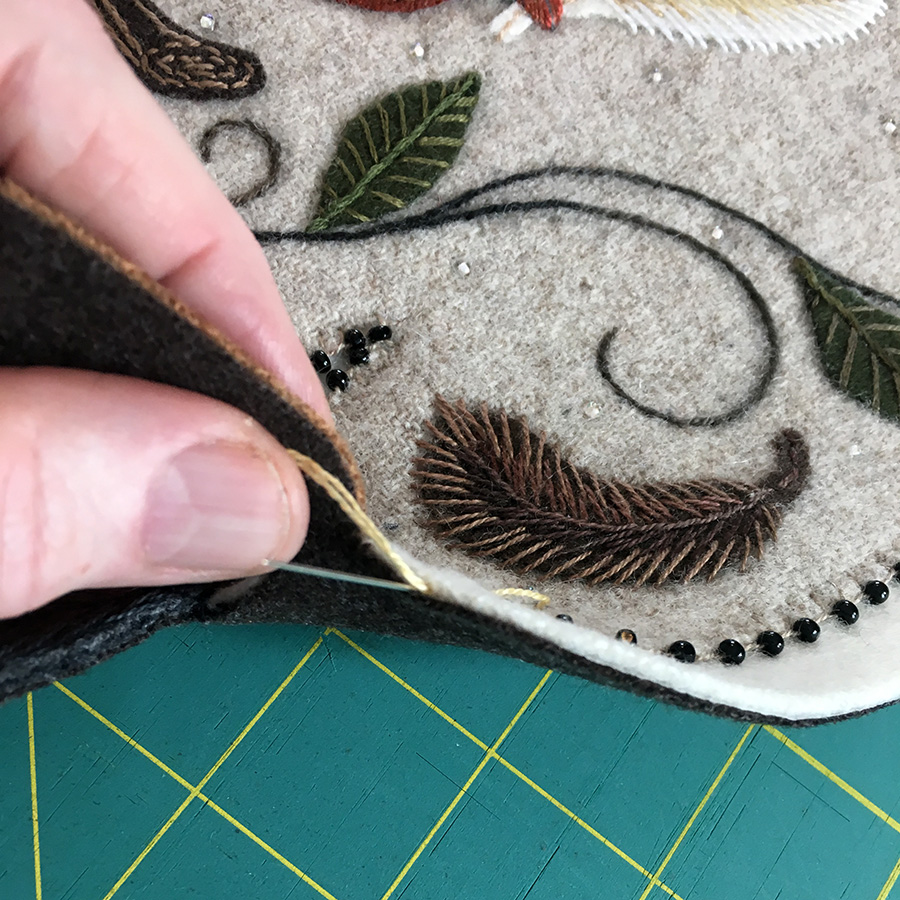


It is a bit difficult to see, but if you click and enlarge the top middle photo, you will see that a black background fabric has been fused to the runner and trimmed – look carefully and you will see the edge of a brown layer of wool (the feather top) with a darker black edge of wool backing. In photo 3, you will see that I am ‘backing up’ my needle between the layers of wool (so that I can avoid having any knots show on the backing) and come up in position to begin stitching the edges (top and backing) of the hanging feather together. Use a color thread to match the straight stitches on the feather(s). The 4th and 5th photos continue to show how to get the needle and thread into position on the feather stem. Once in position use stem stitches around the very edges of the feather(s) to secure the backing to the feather top. See photo 6 to see this stitching around the edges. I find I can usually stitch about 1/16th of an inch away from the edges. When done stitching around the feathers, hide the thread ends in the layers of the wool and trim. Once the feathers are stitched to the backing, the rest of the backing for the runner can be stitched to the top with a blanket stitch, etc. When you come to a feather ‘stem’ simply slide the needle between the wool layers and continue on the other side. Viola! Hanging feathers with one solid piece backing for the runner!
While these photos and steps are explained in the context of the Feather Your Nest Table Runner I can tell you that after the first few and getting the ‘hang of it’ I had fun thinking of all the ways these feathers might be useful in ways not related to the pattern. I would love to see if any of you have ideas!
Well enough for today….Yes there still is more news to come, so check back for the next posting. (Surely, it won’t be a year!)
Happy stitching!
Just saw your roses table runner pattern featured on the Sentimental Stitches blog–congratulations!
Thank you Joan! Yes Gay Bomer, the owner surprised me as she had been buying my patterns via Quiltwoman, but contacted me and wanted to buy direct which was a wonderful thing for her to do since I actually do make a bit more on each pattern versus Quiltwoman. And I have no idea who Quiltwoman sells to so it’s always a bit of a surprise to find my patterns on someone’s site! Stopped in Northfield and saw a few of your quilts – I don’t know how you get so much done. They were delightful! Hope to see you at the May meeting!